Yarn was provided by LoveCrafts.
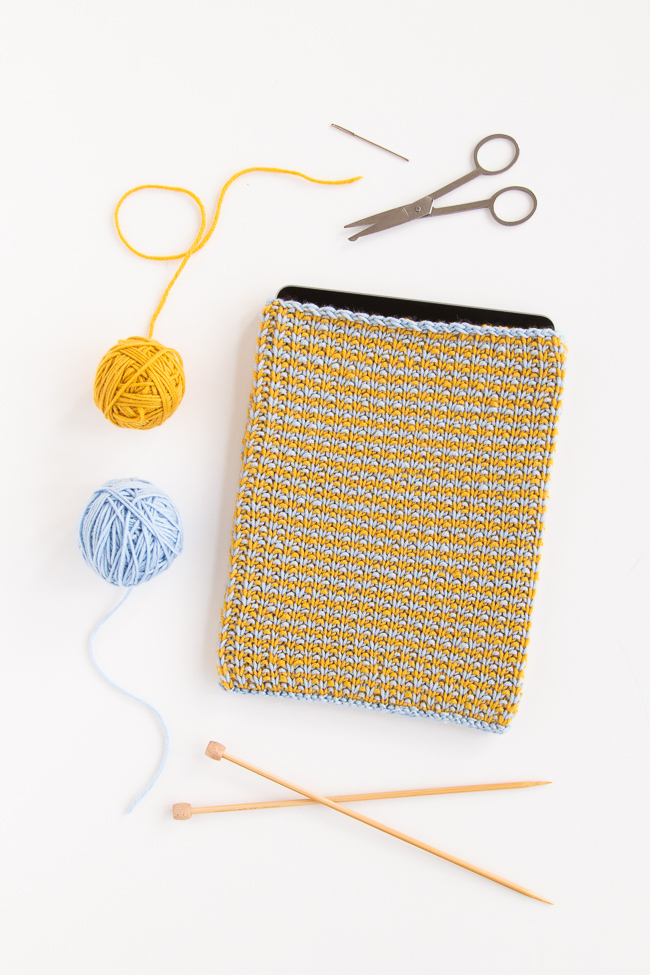
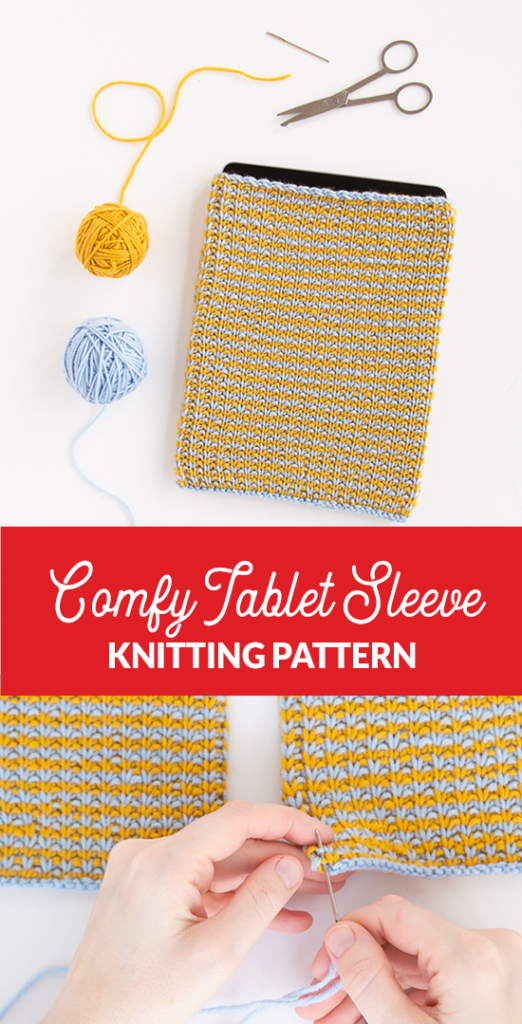
Sometimes finding the right pattern for a gift can be challenging, especially if you don’t have gobs of time on your hands for making something huge. In that spirit, I recently made my husband a new tablet sleeve, which I’ve dubbed the Comfy Tablet Sleeve. (He kept tossing his tablet loose in a bag – just thinking of the scratches was freaking me out!) This project comes together easily in a weekend, and doesn’t require a profound skill level to complete either. Needing just 60g of DK weight yarn to complete, the Comfy Tablet Sleeve makes a good stash-busting project too!
Get an inexpensive, printable, ad-free PDF of this pattern here, or read on for the blog version of the pattern.
Comfy Tablet Sleeve – Knitting Pattern
Skill level: Easy
Supplies
1, 50g skein each of Debbie Bliss Rialto DK yarn in 2 colors. Pictured colors: Mustard (yellow), Sea (light blue).
US 6 (4 mm) knitting needles, straight
tapestry needle for seaming & weaving in ends
Abbreviations & Terms
CO – cast on
long tail cast on – Here’s a tutorial.
sts – stitches
Clr A – color A (Pictured: light blue)
RS – right side
Clr B – color B (Pictured: yellow)
sl 1 wyib – slip 1 stitch with yarn in back
WS – wrong side
sl 1 wyif – slip 1 stitch with yarn in front
rep from *- repeat the instructions following the asterisk as directed
BO – bind off
Icelandic Bind Off – Here’s a tutorial.
mattress stitch – Here’s a tutorial.
Notes: Below the pattern, find a tutorial for how to seam the two panels of this Sleeve together using a modified mattress stitch.
Gauge & Dimensions: Approx. 24 sts x 42 rows = 4 inches (10 cm). Each finished panel measures 6.8 by 9.6 inches after wet blocking, but before seaming. The finished, seamed sleeve measures approx. 6.25 by 9.5 inches.
This sleeve was designed to fit the iPad 9.7-inch, which measures 6.6 inches wide by 9.4 inches tall. There is a modest amount of negative ease built into this pattern so the sleeve may fit its tablet snugly. You may alter this pattern to fit your own device by changing the number of stitches cast on and/or by working more or fewer rows. of the pattern repeat.
Get an inexpensive, printable, ad-free PDF of this pattern here, or read on for the blog version of the pattern.
THE PATTERN
Front Panel
CO 42 sts (or any even number of sts) in Clr A using a long tail CO.
row 1. (RS) With Clr B, *k1, sl1 wyib; rep from *.
row 2. (WS) With Clr B, *k1, sl1 wyif; rep from *.
rows 3-4. With Clr A, rep rows 1 and 2.
Rep rows 1-4 twenty-five times total.BO all sts using an Icelandic bind off and Clr A.
Back Panel
Worked exactly the same as the front panel.Finishing & Seaming
Weave in all ends and wet block to size (6.8 by 9.6 inches). Using Clr A yarn and the mattress stitch, seam together long sides of each panel. Using a running stitch, seam together CO ends to complete your sleeve. Weave in all ends.Note: 15g of each color of yarn is used per panel, so you will have approximately 20g of each yarn color left over after finishing this pattern.
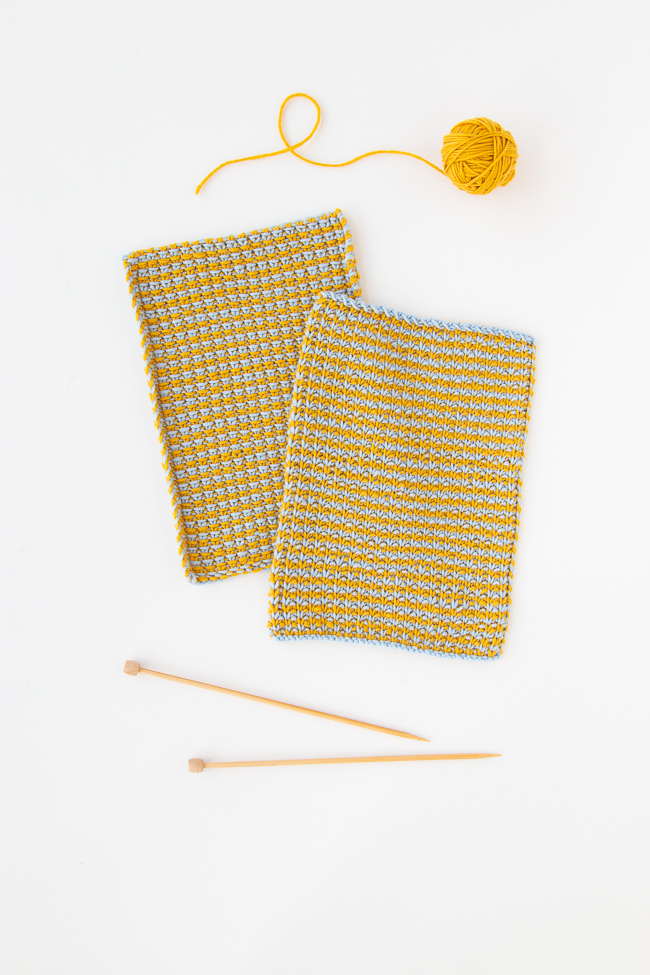
Modified Mattress Stitch – Seaming Tutorial
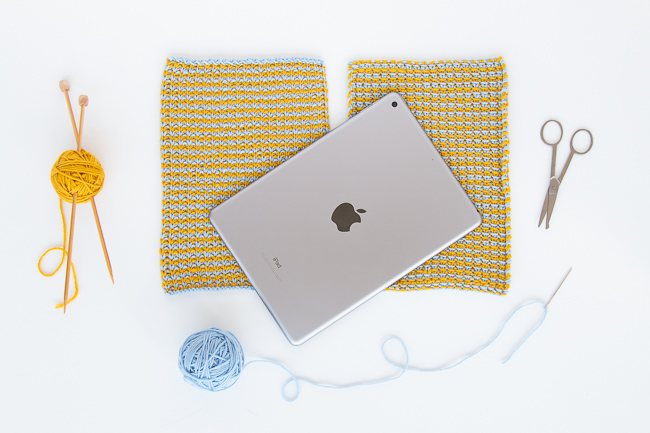
First up, confirm your panels are big (or small) enough for your tablet. You can see in the above photo that my iPad is just about the same size as each of my knit panels, both of which have been wet blocked to the appropriate size. This isn’t a garment, but fit does matter in order for this sleeve to fit… like a glove. (You’re welcome for that incredible joke!)
Finding your legs / working a modified mattress stitch
Lay your panels next to each other, right sides facing up. CO and BO edges should be side by side as well.
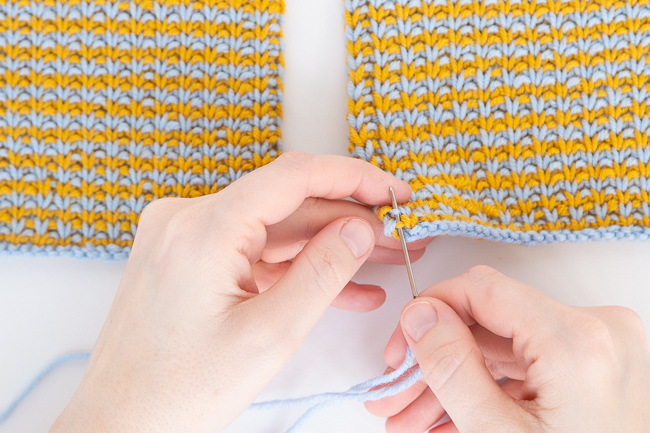
Thread your tapestry needle (large sewing needle) with Clr A yarn. Your yarn should be approximately 2.5 times the length of the seam you’re sewing. (In my case, that means 2.5 times 9.5, the length of the side seam, is 23.75 inches.)
Insert your needle from front to back under the first two stitch legs at the bottom left of the right hand panel as shown above. The two legs you’re looking for in this modified version of the mattress stitch are in between the first and second columns of stitches, and there should be one of each color as you pick them up. Leave yourself a 6-8″ tail for weaving in.
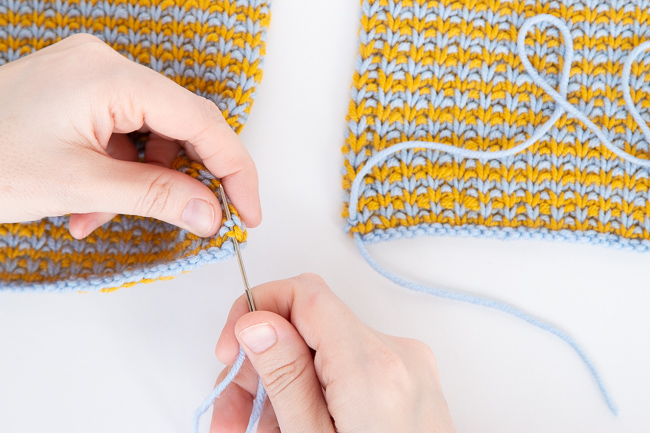
Next, insert your tapestry needle under the two corresponding stitch legs of the left hand panel as shown above. Draw your thread through.
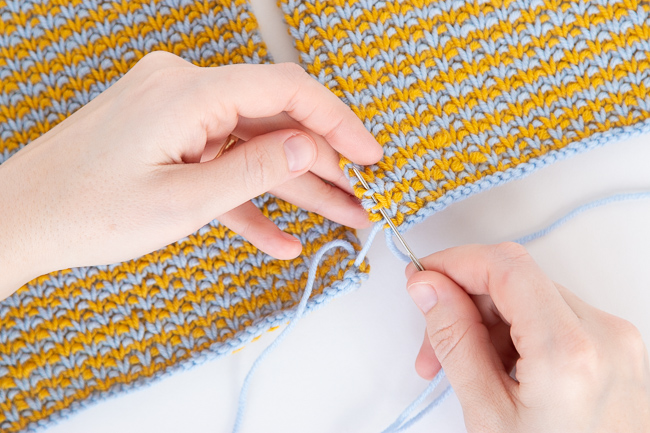
Continue seaming in this way, sewing under two stitch legs of the right hand panel followed by the corresponding stitch legs of the left hand panel. Every couple of stitches, tighten your work without affecting the tension of the fabric. Too loose, and there will be a weak seam with gaps. Too tight, and your fabric will get scrunched up.
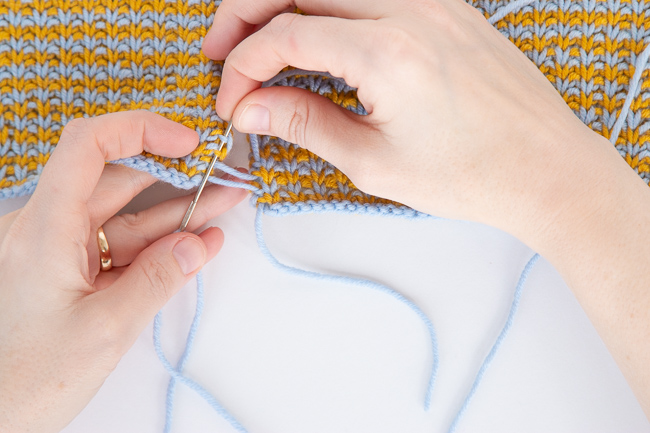
Tightening things up
After you’ve found a few pairs of stitches, you can draw up your working yarn to bring the panels together. Just remember not to pull too tight.
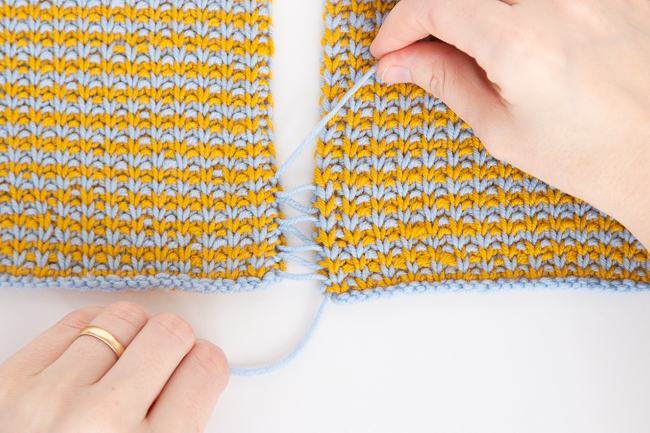
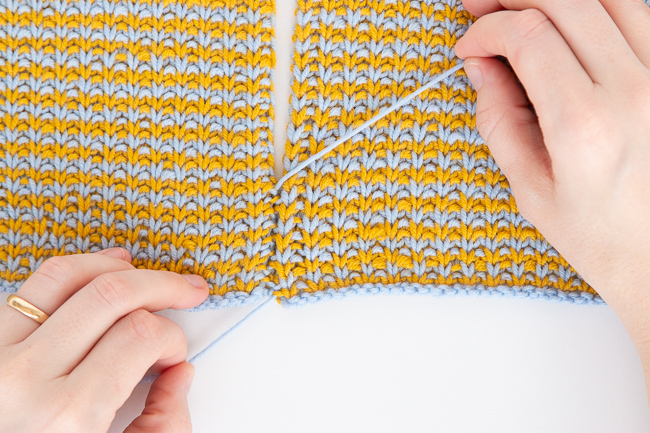
If you feel like your panels look slightly offset, that’s ok! You can see mine were as well. The slight offset can be masked when you weave in your ends.
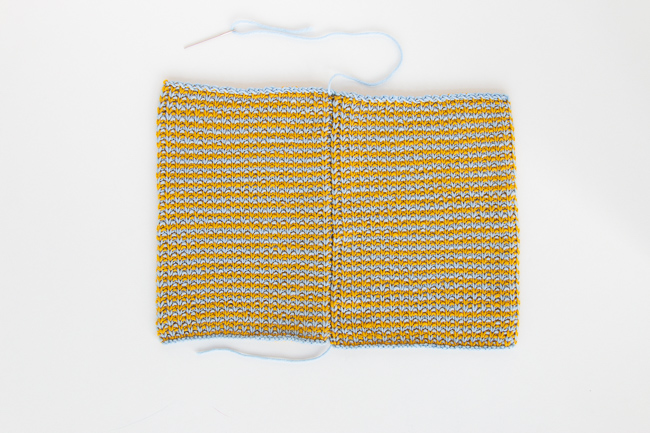
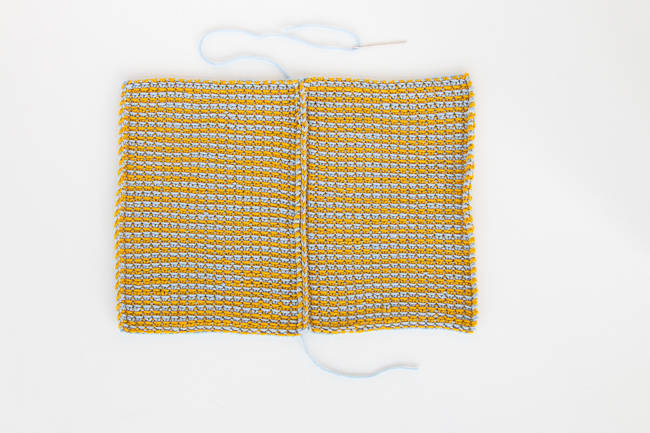
Second tall seam, almost the same as the first!
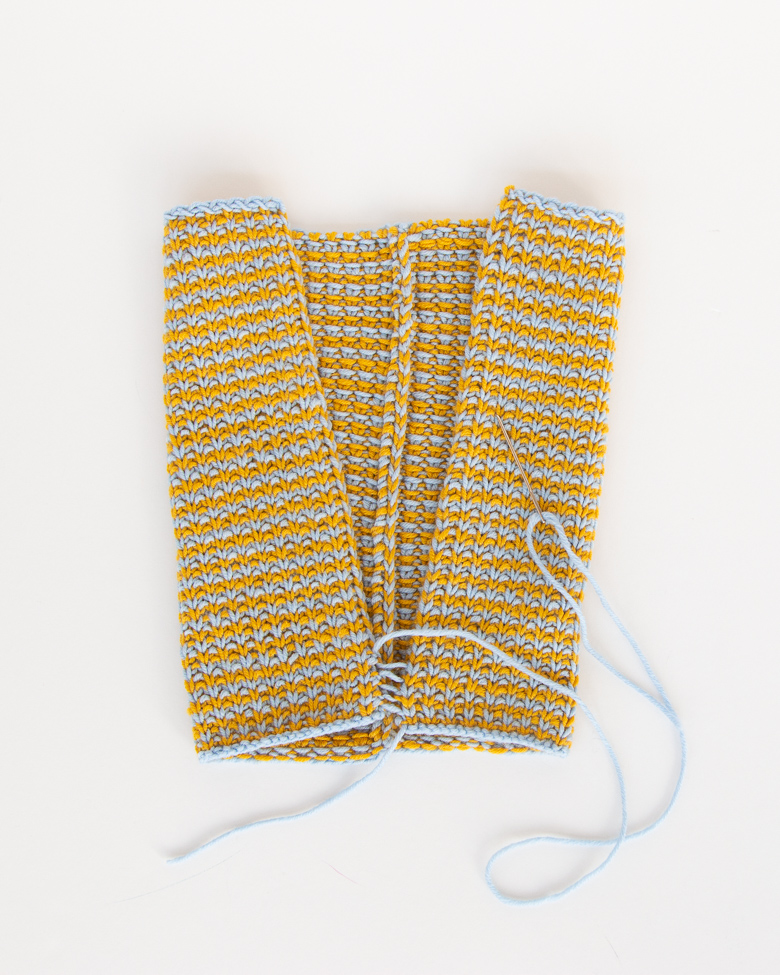
That’s right! For the second long seam, you do the exact same thing as for the first seam, but it’s slightly more awkward because you’re seaming two ends of essentially a tube together. Placing your work as shown above is the easiest way to accomplish the second seam.
Seaming the bottom
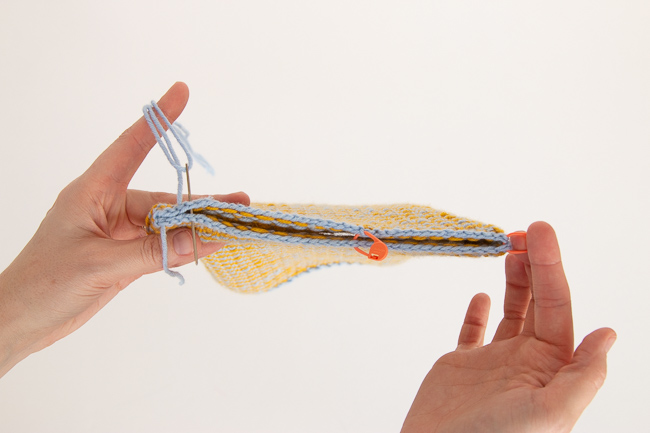
Finally, you’ll use a basic running stitch to sew the CO ends of your sleeve shut. Hold your sleeve “tube” flat, with the side seams at each side. Starting at one end, insert your tapestry needle (threaded with 2.5*6.7=16.75 inches of Clr A yarn) through both panels of your sleeve, leaving another 6-8″ tail. Sew from one end to the other end with a running stitch. The stitches themselves will be hidden among your original cast on stitches since the CO and seaming stitches are both done in Clr A.
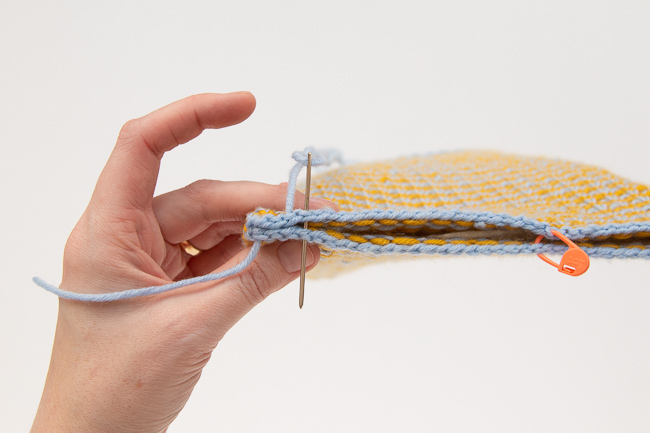
When you’ve finished, your sleeve will look like this. Weave in all ends, masking any flaws as needed.
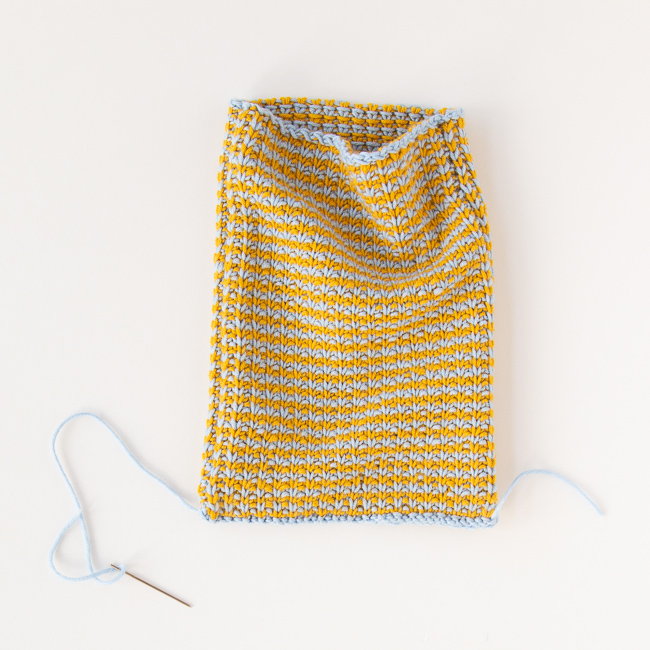
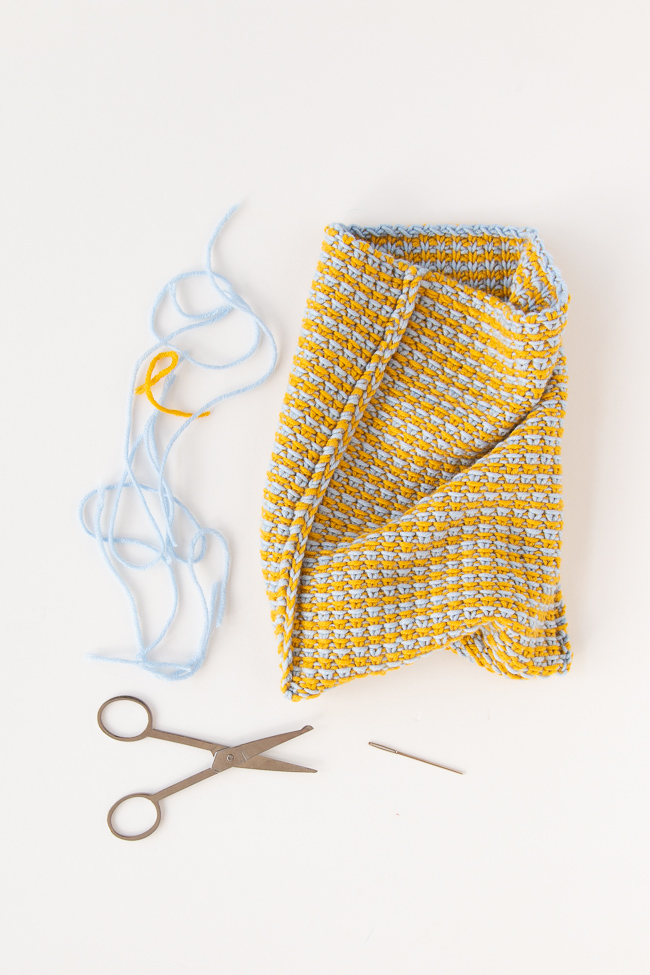
If you make your own Comfy Tablet Sleeve, don’t forget to share it with the Hands Occupied community on social media using #handsoccupied.
P.S. A note about Christmas in July & working with blogger friends!
This post exists because I was invited to participate in a make along! Marie from Underground Crafter is hosting 31 days of crafty fun to kick start the handmade holiday season (I’m sorry, I know!). There will be 5 weekly themes, a weekly roundup, and a giveaway. This week’s theme is gifts for guys, so I thought a tablet case (that you can 100% make for anyone, not just dudes) would be quick and fun and not too overly seasonal-ish for those of us not ready to think about holiday gifting!
Read all about the Christmas in July Make Along, enter to win the make along prize pack, and find dozens of other free, gift-worthy knitting, crochet and sewing patterns, all in this post. Giveaway deadline is 8/4/19.
Yarn was provided by LoveCrafts.


 & shop new patterns


Leave a Reply