I got really into embroidery when I was out of town last month. With the help of Wild Olive’s embroidery basics series and a couple of spare hours in an airport, I think I’ve added a new skill to my personal crafty toolkit.
Today, I want to share an easy embroidery project idea that can come together in just a few hours, as well as instructions for a custom stitch I invented at 10,000 feet (more on that in a second).
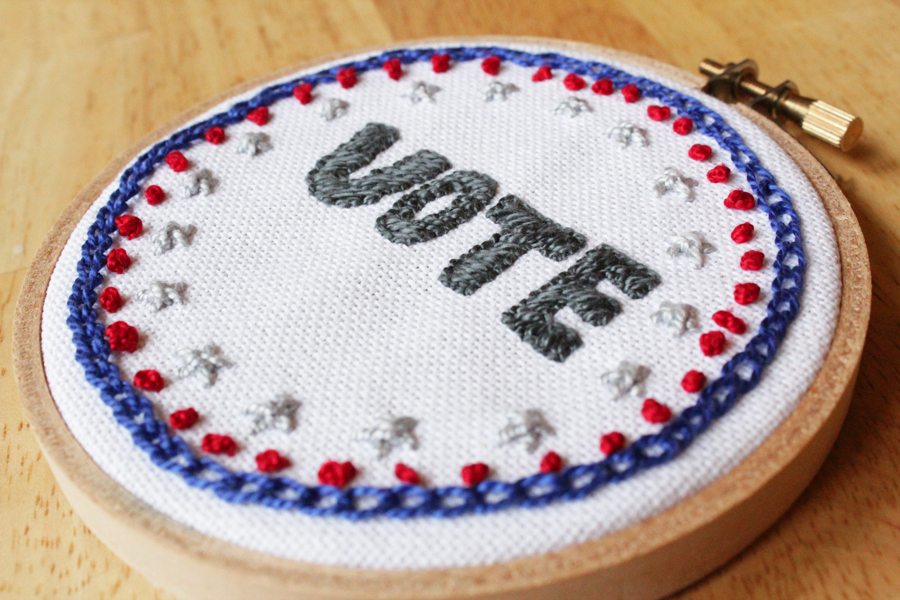
This began as a simple sampler on a 3-inch embroidery hoop. I really just wanted to master the chain stitch, French knots, and the satin stitch. Many years of dinking around with simple sewing projects prepared me to learn proper embroidery technique. I have been using the running stitch since I was a little kid, and the back stitch was simple enough for me to easily grasp.
Skip to: VOTE Embroidery Design Instructions // Mini Star Stitch How-to
Supplies
3-inch embroidery hoop
red, blue, silver, and charcoal-colored embroidery floss
needle
embroidery canvas
Directions: VOTE embroidery design
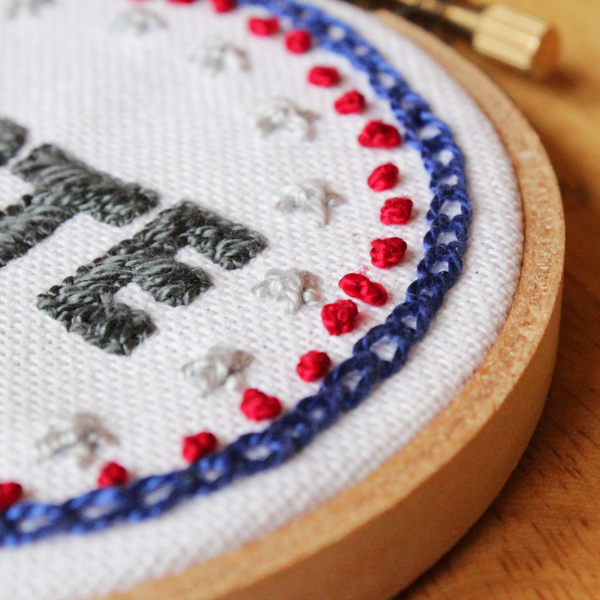
As you can see in the picture, there are only a few steps to this embroidery design. Running parallel to the embroidery hoop, simply chain stitch all the way around the circle. Then, do a circle of French knots, followed by a circle of mini stars (see below for instructions). Then in the center of the circle, embroider the word VOTE onto your canvas. I free-handed the letters, but you can use a transfer pen to draw your letters first and then stitch over the marks if you prefer. Learn more about transferring patterns here. I outlined the word VOTE in back stitch and filled them with satin stitch. I really love the look of the satin stitch on the finished project!
Directions: Mini Star Stitch
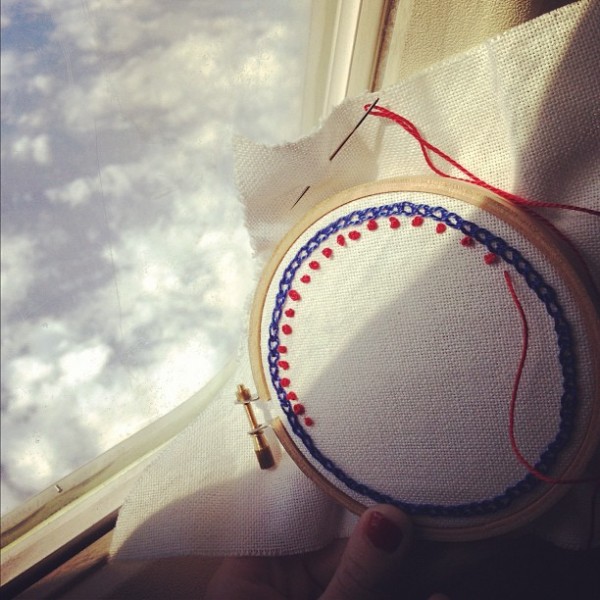
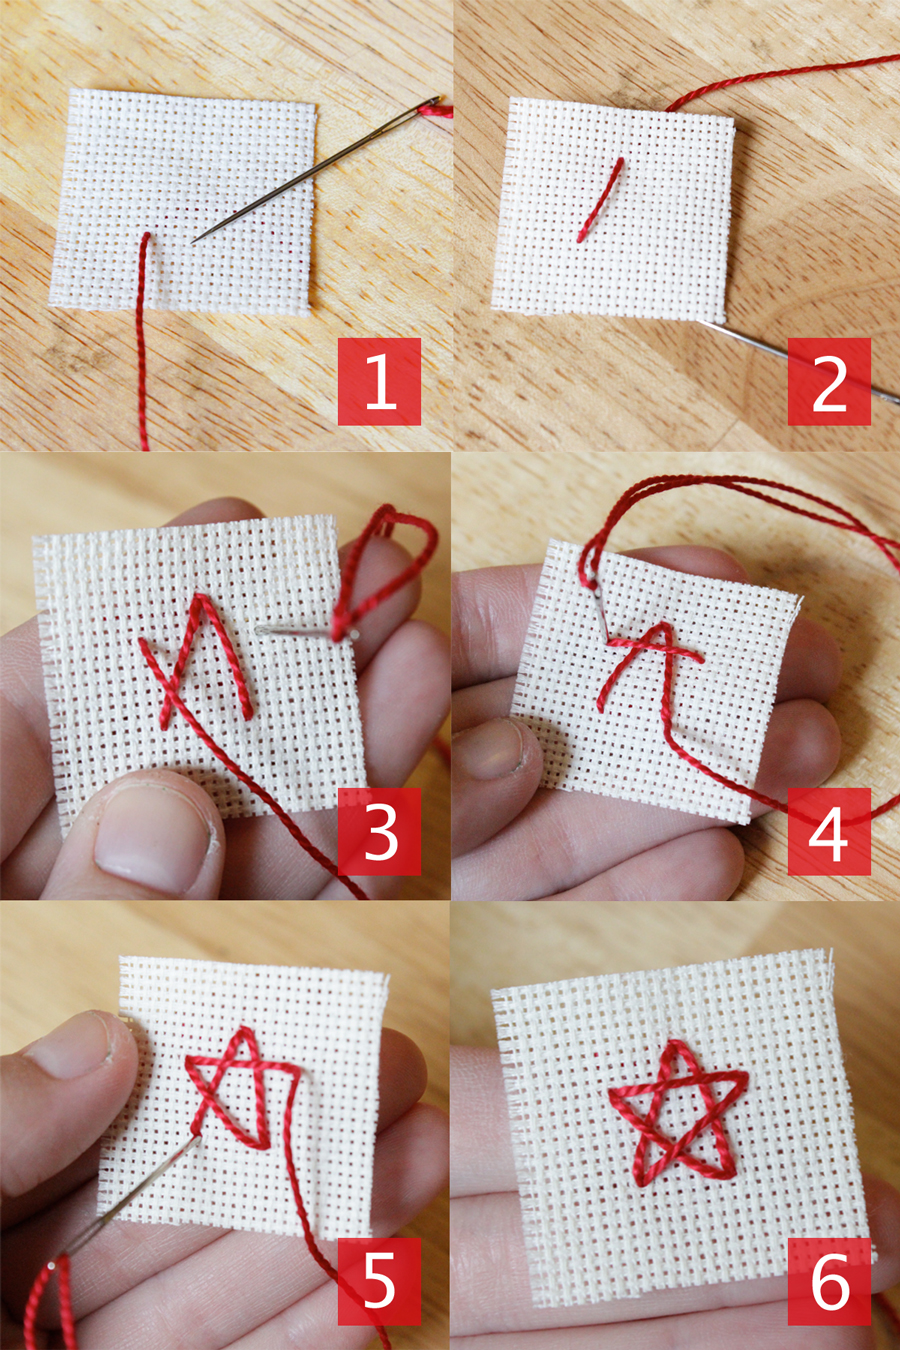
I took some creative liberties with my otherwise-proper embroidery project with that mini star stitch. I was flying in a plane, i.e. no internet access for searching the web for a legit star stitch tutorial. With over an hour left in my flight, I didn’t want to have to stop working on my project or do more rounds of stitches I already felt confident using. Evidence of my plane-stitching, as if it’s an excuse for how lazy/impatient I can be with crafting…
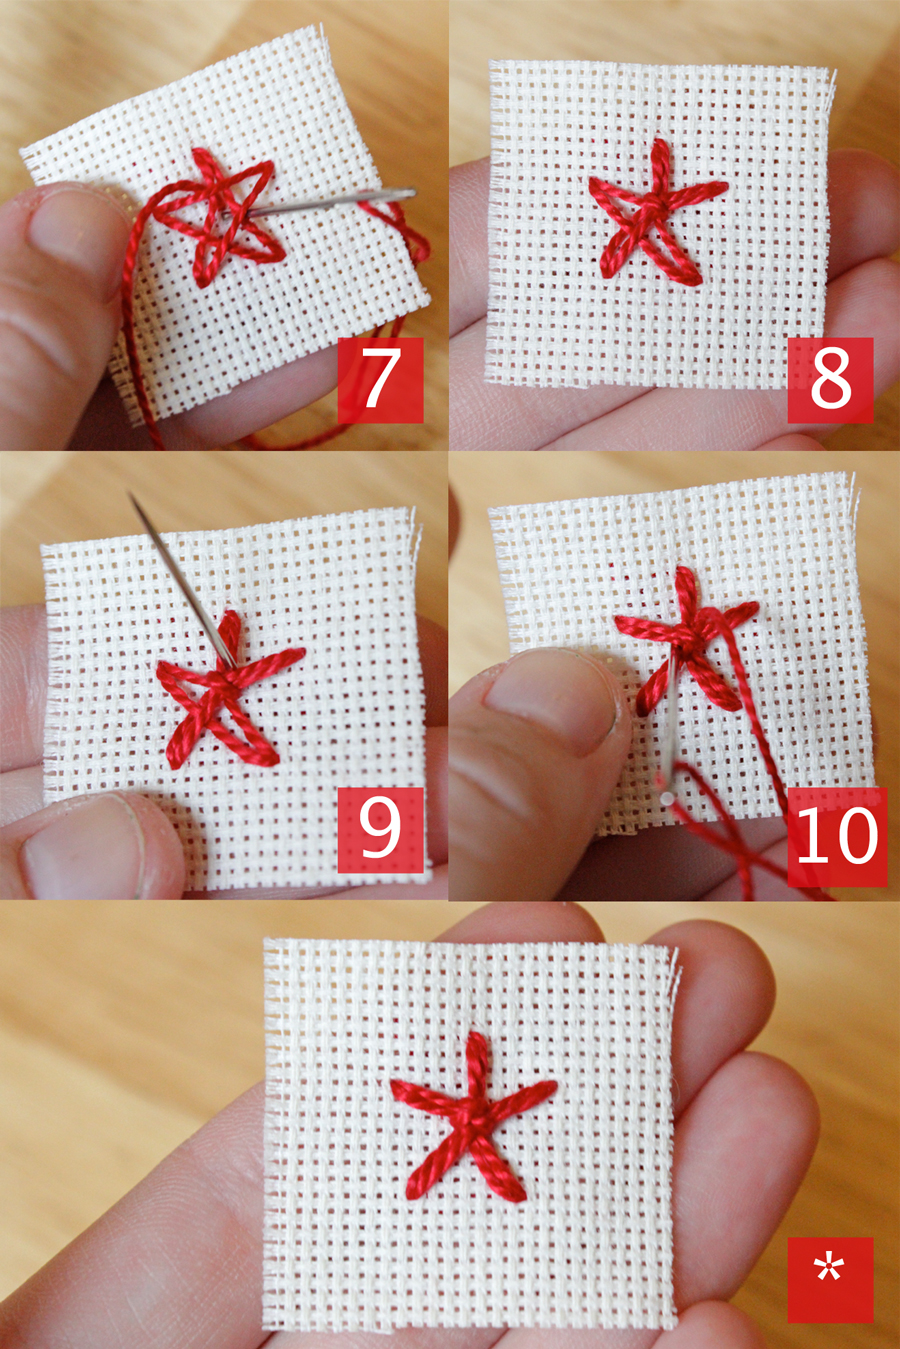
Anyway, a couple things about the star stitch before we dive in. I did all of my star stitches on the VOTE project at a much smaller size that what you’re about to see in the pictures. I first photographed the steps true-to-size, which was not a great idea tutorial-wise. So I redid it bigger for demonstration’s sake. Just keep that in mind as you follow these steps. :)
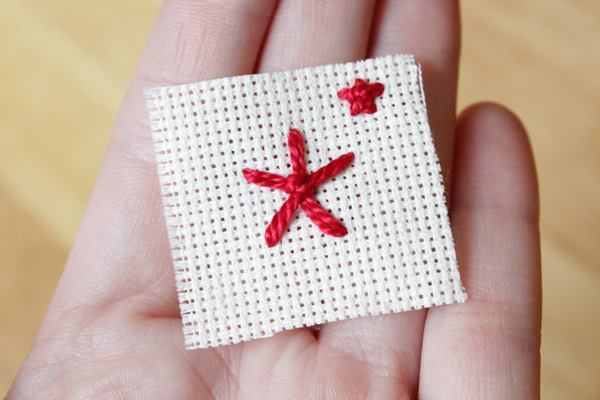
As you can see, the first part of this “stitch” is sewing a star that looks just like one you’d draw with paper and pencil. But when you do this on a teeny tiny scale, the star basically looks like a crappy French knot fail, and not a star at all. The next step is critical for the mini star to look like a star in your embroidery.
Looking at the pictures below, you’ll see that you come up from the back at approximately the center of your star. Then you’ll sew an X, with one bar of the X securing two of the five points of the star, and the second bar of the X securing two more points. The fifth point finds its place on its own.
I also sewed a mini star using the exact same process as the big demo star to show you the difference in how they look. The big star ends up looking like an asterisk, whereas the little star looks just like a little star should. It’s so cute!




 & shop new patterns


Love it Heidi!! Been looking for an easy star pattern – thank you!!
Love your little star creation! Nice job, just what I needed for a moon and stars project!
This is so so cute! The Star Stitch is excellent!