In recent weeks I’ve been a bit obsessed with teaching you different techniques for finishing latch hook projects. So far we’ve covered how to finish square latch hook projects and how to finish non-square latch hook projects. But what about a project with a whole bunch of square edges and corners, some of them right on top of each other without enough seam allowance to go around? Or a project with a mix of square and squiggly edges?

What I mean by “nooks and crannies in latch hook.”
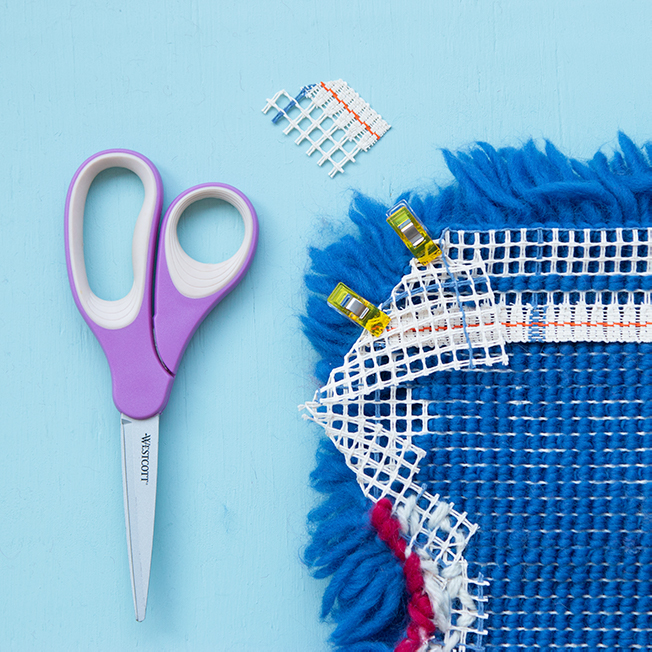
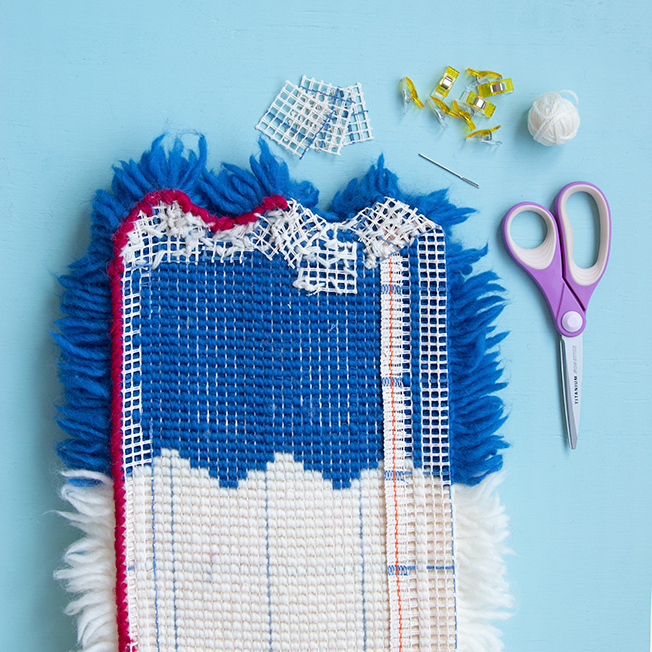
Taking the project pictured in this tutorial with its many-curved edges as an example, those familiar with latch hook finishing will notice that there’s simply not enough seam allowance (see this post for latch hook vocabulary) to finish the raw edge of your latch hook canvas. To finish nooks and crannies in latch hook, you use the same finishing methods you’d use in any latch hook project. However with nooks and crannies lacking in enough seam allowance to finish, you will stitch in additional scraps of rug canvas to reinforce and finish your project, rather than simply folding back and stitching or knotting your seam allowance in place.
If this isn’t clicking, read through the following tutorial to see what I mean.
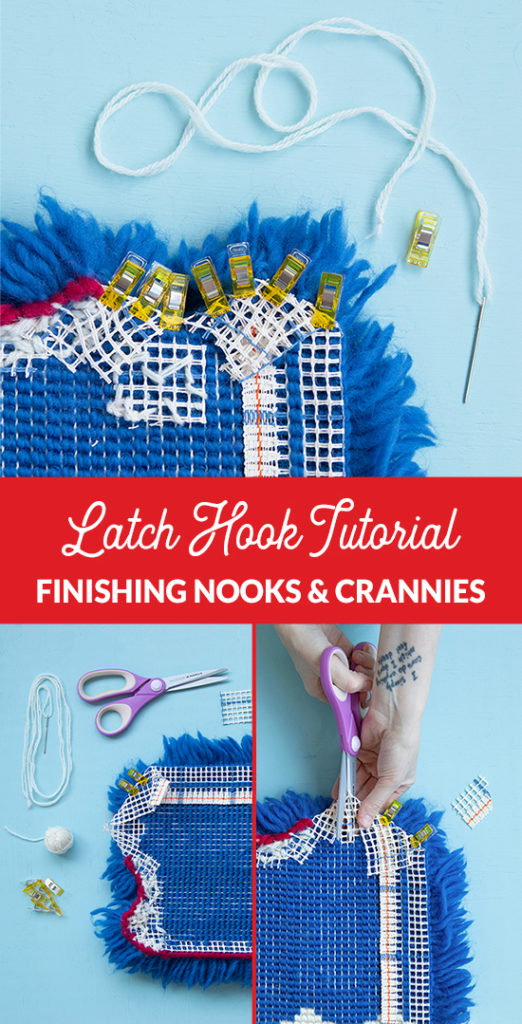
How to troubleshoot latch hook finishing for unusual nooks and crannies
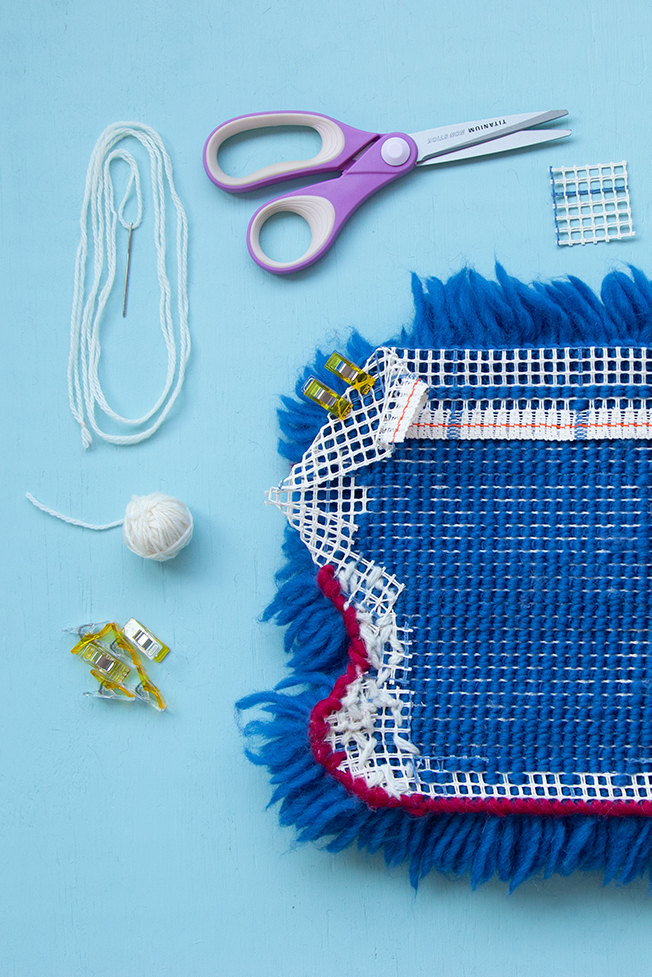
SUPPLIES
hooked latch hook project in need of finishing
scissors
sewing clamps or clothespins (pictured: Clover Wonder Clips)
tapestry (yarn) needle
worsted weight yarn
Directions
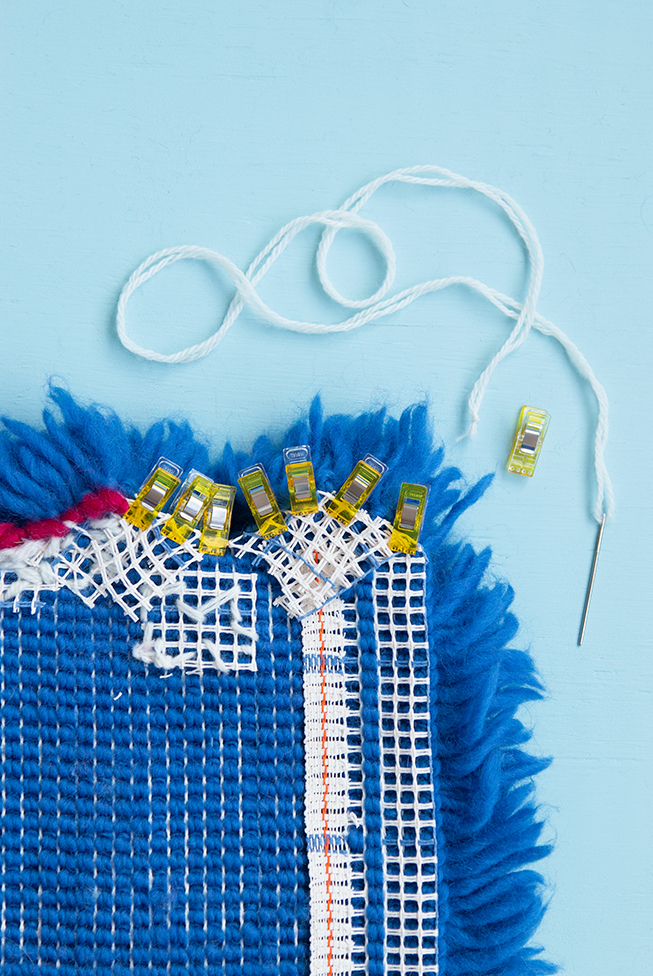
When you’re finishing the edges of nooks and crannies, you work one edge at a time (sometimes that edge or nook or curve might be pretty small!). The first edge of the pictured example is simple because it’s finished just like any non-square latch hook edge: Fold back your seam allowance, clip in place.
If a natural fold forms because you’re working a curved edge, clip it. Be careful not to cut your project yarn by accident.
Again as in non-square finishing, you may now unclip your canvas, overlap the clipped edges and clip once again in place. The first edge is now ready to be stitched in place. But before we do that, we have to finish prepping the rest of our jagged canvas edges.
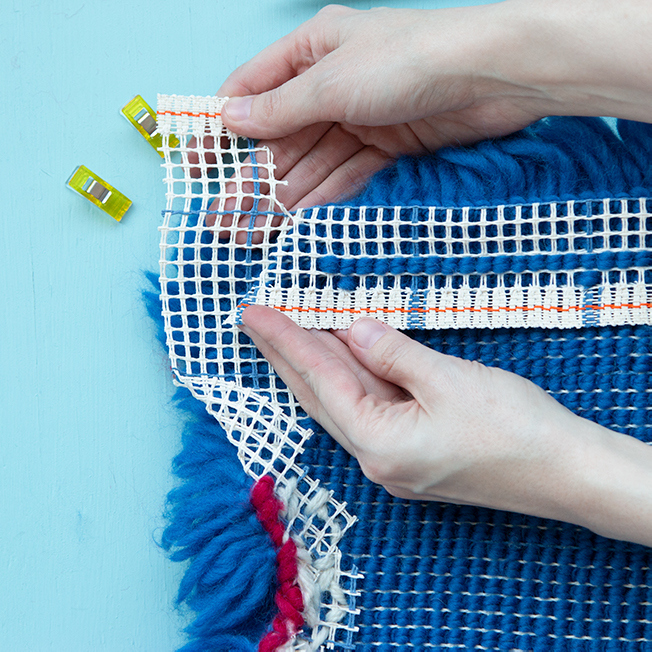
Right here in our sample latch hook project, the next couple of edges form a valley – a nook or cranny if you will.
This is the hardest thing to finish in latch hook, I won’t lie. But also, once the concept clicks in your maker brain, it’s also not inaccessibly hard, depending on the project in question.
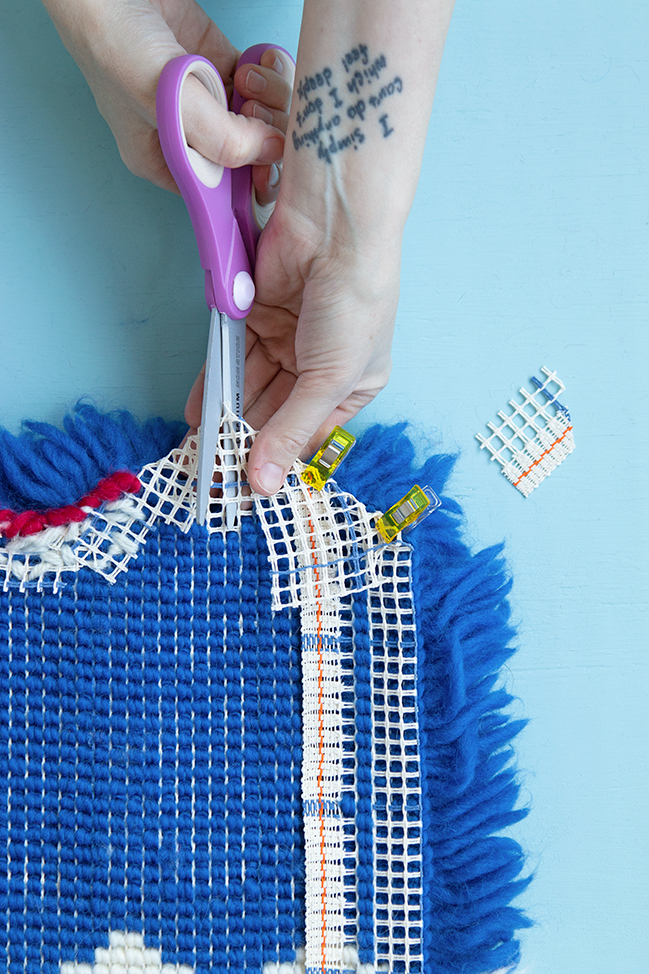
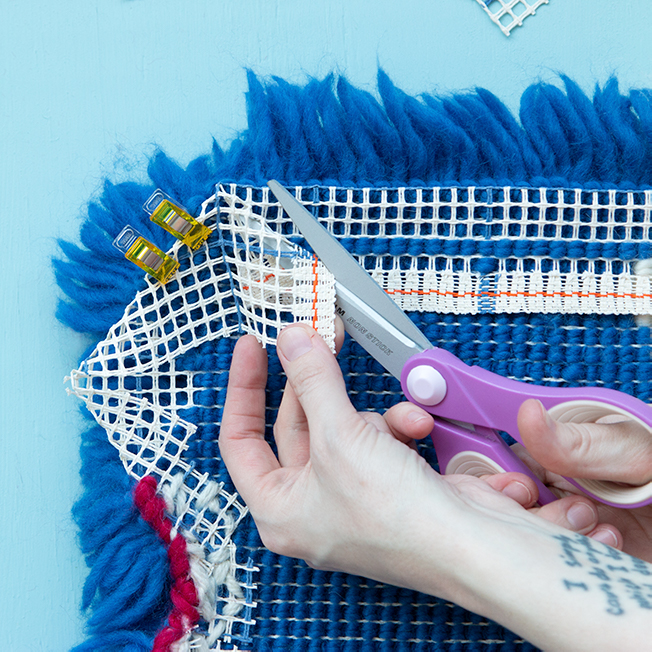
To even be able to fold back this project’s seam allowance, we’re going to have to introduce a cut that will produce an edge with way less than the recommended 1-2 inches. As little as a quarter inch (a.k.a. one single square of rug canvas if your project uses 3.75 mesh*) of seam allowance may be all that’s available.
*I have a whole post planned about latch hook rug canvas that will explain this mesh business for folks hungry to learn about gauge in rug making. Hang tight!
Am I telling you to break the rules? 100%
As in the photo above, you need to carefully (!) clip your canvas so the available seam allowance can be folded to the back of your work. Again use clips to secure edges as they’re ready, as shown below.
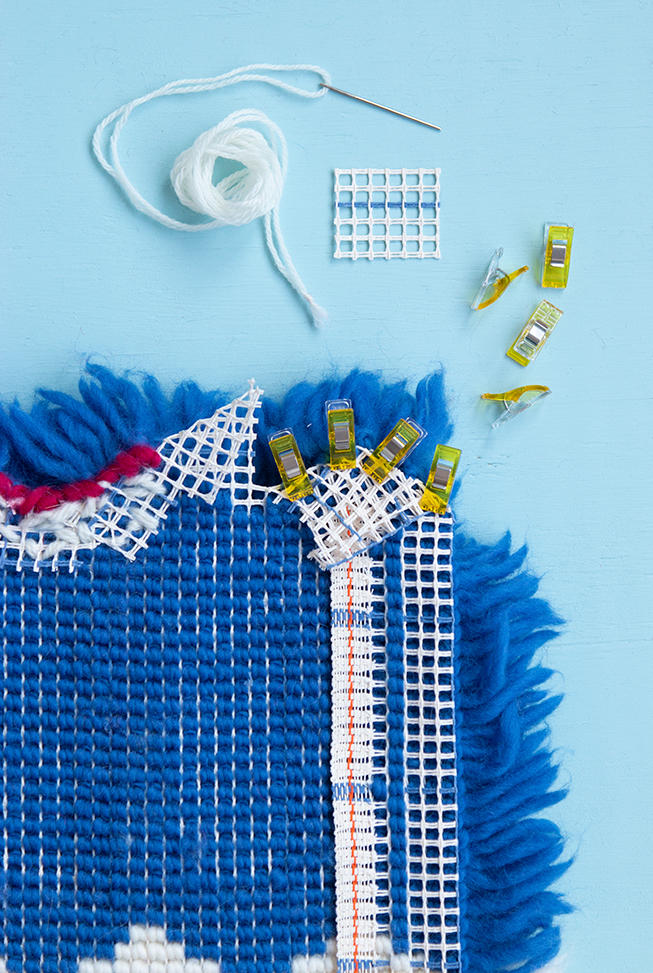
Patch in scrap canvas when you need to.
Don’t have enough built-in seam allowance to stitch back your edge?
How you know you don’t have enough seam allowance: do you have less than an inch of canvas to fold back? If the answer is no, your canvas may begin to fray when you try to fold back your lack of seam allowance. If the fraying expands to the canvas of the body of your latch hook rug (the part that your knots are tied to), your rug can eventually fall apart. Especially if it’s actually being used on the floor… as a rug. (Go figure, right?)
If you need to use extra scraps of canvas to finish your edge, simply stitch a piece of canvas to the back of your work as near to the edge lacking seam allowance as possible. (For the sake of photo clarity, I patched in my canvas slightly away from the edge. I recommend patching in canvas flush with a project edge for the best results.)
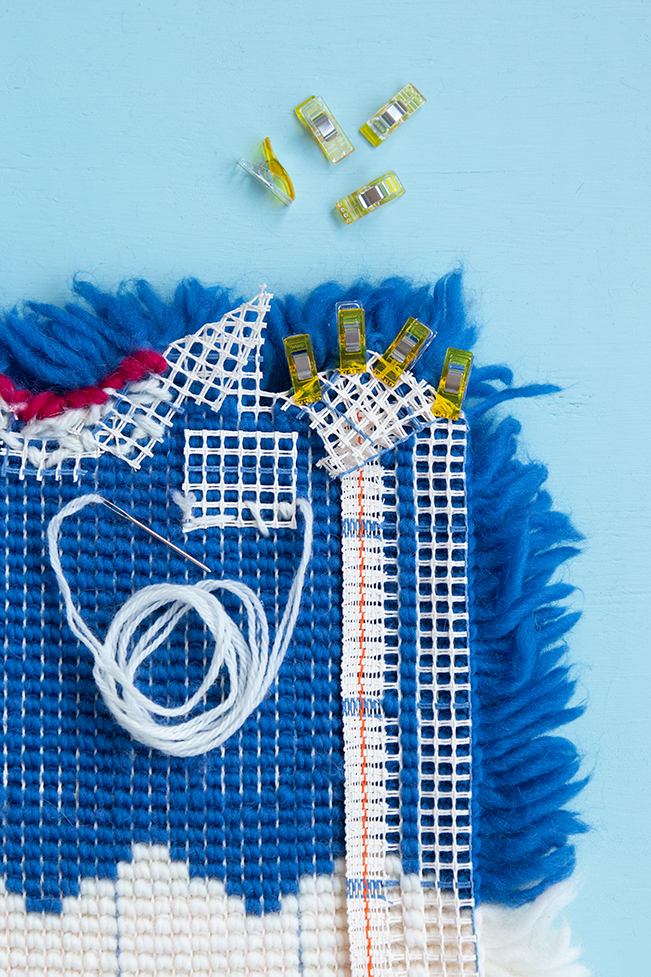
Continue prepping your canvas edge for finishing in this way, patching in scraps as needed. When you’re ready, follow my non-square finishing tutorial for how to finish the rest of an edge like the one pictured.
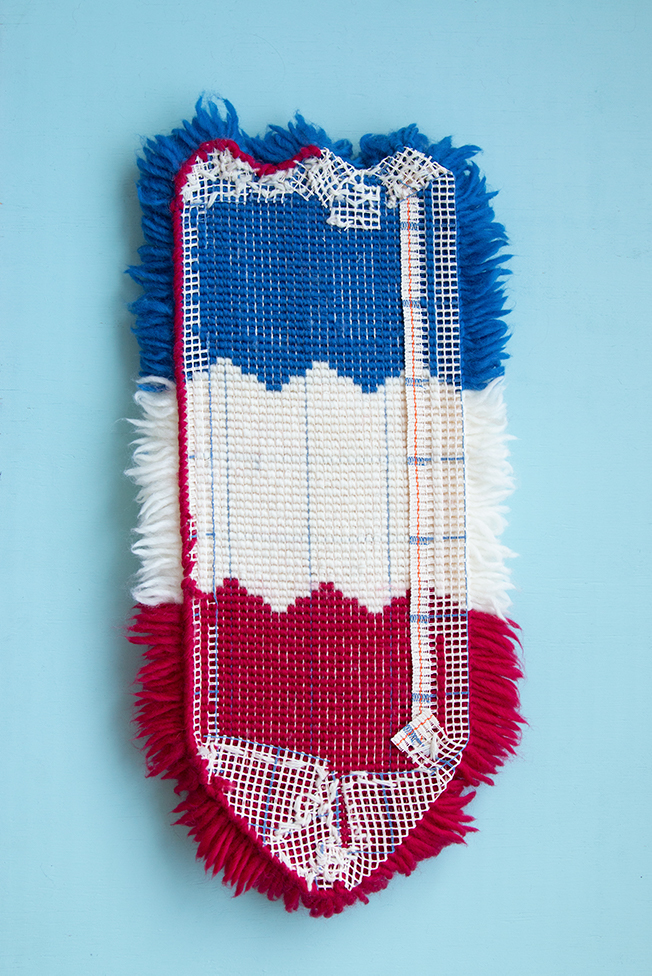
Zooming out, here’s a look at what an edge finished with (from top to bottom):
- nook and cranny troubleshooting with a patch of scrap canvas to compensate for the natural lack of seam allowance
- square edge finishing on the straight sides
- a typical example of non-square finishing
And that’s finishing! Once you have a latch hook project or two under your belt, finishing absolutely becomes second nature, troubleshooting small nooks and crannies no problem!


Leave a Reply