This is a great, affordable, quick project for the new baby in your life. Or in my case, my friend’s. The summer after my first year of college, I worked in an absurd baby store called Wizard of Kids. My first task at that gig was stocking these baby toys called Taggies, which were the inspiration for this project.

-
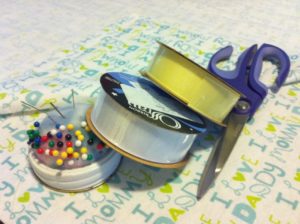
 Gather your supplies: ribbon cut in to 5-inch pieces, medium weight fusible interfacing, iron, flannel, sewing machine, iron, scissors, straight pins.
 - Cut your flannel and interfacing all to the same size. The flannel I bought for this was a fabric remnant, so I didn’t do any measuring – I just cut it in half and then cut the interfacing to the same size.
- Fuse interfacing to wrong side of one of your pieces of flannel following the directions that came with it. (I didn’t want my blanket to be too bulky, so I opted for a single piece of interfacing.)
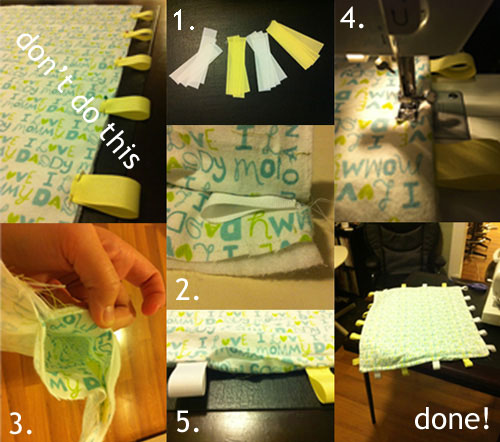
- Lay the piece of flannel that doesn’t have interfacing on top of the piece that does, right sides facing. Fold and pin ribbon as shown in image 2 above. Make sure the tabs are pointed toward the center of your blanket, not outward. Otherwise, your tabs will be hidden inside the blanket. Believe me, I had to tear out and start over from scratch. Wine and crafting aren’t always the best choice. :)
- Sew around blanket, making sure to secure all ribbon pieces. Leave a small opening for turning your blanket right side out (pic 3).
- Sew all the way around your blanket, approximately a centimeter from the edges (pic 4). This is the step at which you’ll be glad you only used one piece of interfacing. I’ve broken too many needles trying to sew through really thick projects.
- Hand sew the turning opening closed, and you’re all done!


 & shop new patterns


Leave a Reply