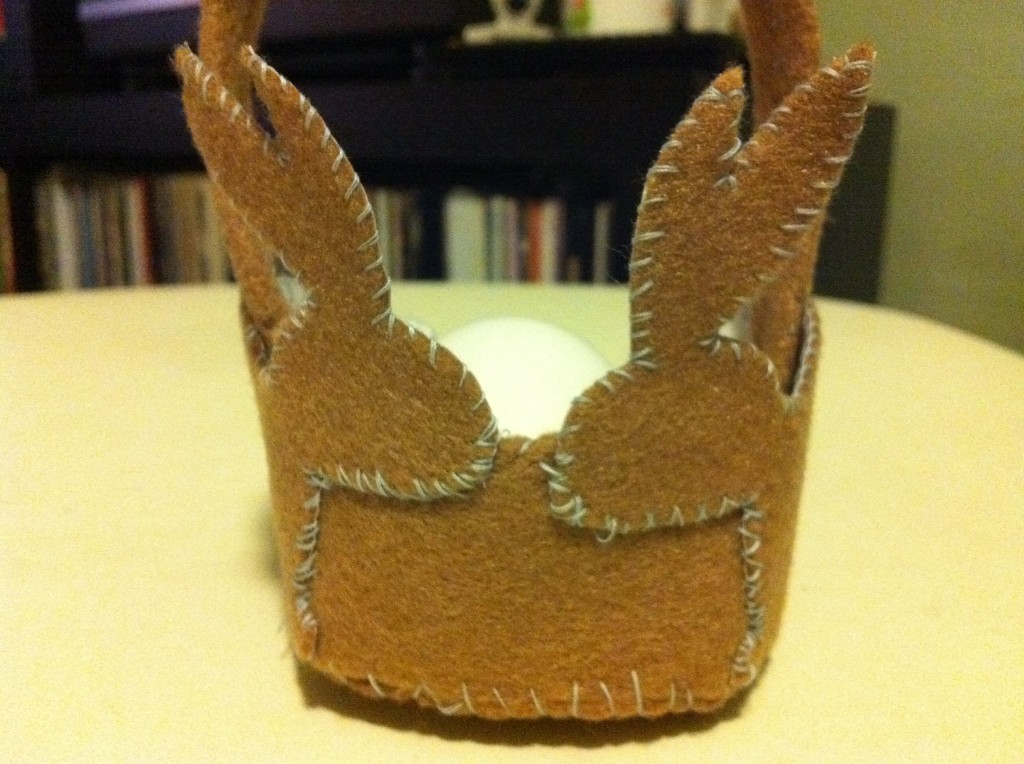
I’ve been wanting to make a hand-sewn felt project for awhile now, so for Easter I decided to make a little bunny basket with appliqué-style stitching. I finally took the plunge using these Tips for Felt Sewing Projects from Ever Kelly as a guide.
 For the record, I wrote the post late at night while tired. Leave a comment if I wrote something in a stupid or confusing way. On the About page, I tell you to hold me accountable for good tutorials, so this is me reminding y’all to call me out on my tired-bloggin.
Supplies
Freezer Paper
Pencil
Felt
Scissors
Thread in a contrasting color
Nail polish
Directions
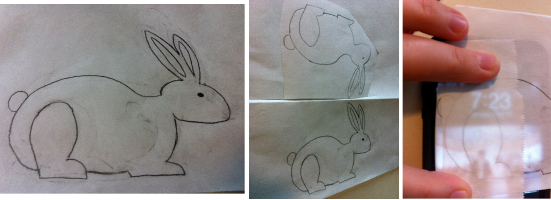
Tear off a piece of freezer paper and draw a bunny on the un-waxed side. Fold your freezer paper in half and trace  a mirror image of the original bunny, again on the un-waxed side of your paper. (I used my iPhone as a tracing box & it worked!) Unfold your freezer paper. For added depth on your bunny, trace two rear legs, as shown, to sew on top of your bunny silhouette.
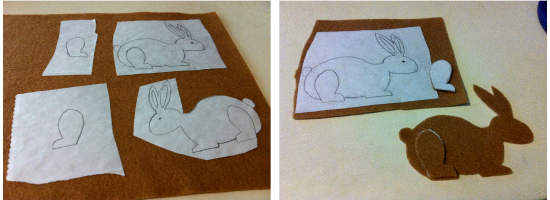
Iron your bunny freezer paper to a piece of felt with the waxed side of the paper facing the wrong side of your felt. Cut out your bunny shapes (and legs) directly through the felt and the paper all at once. As I learned from Ever Kelly’s instructions, the key to sewing felt projects is very precise cutting. The freezer paper really makes a huge difference compared to other felt projects I’ve attempted in the past.
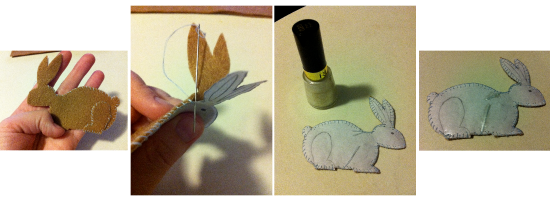
Whip stitch the freezer paper to the felt, even though they’re already ironed together. This will help give some structure to your basket. When all of the bunny pieces are sewn to their freezer paper, sew the bunny legs on to your bunnies. Flip your bunnies over and use a little bit of nail polish to keep loose ends of thread in place.
Cut three strips of felt and one strip of freezer paper all the same size. Mine were about 9.5×1.25 inches. Sandwich the freezer paper between two of the pieces of felt and whip stitch them together into a ring. Join the ends.
Trace the circle formed by your ring on to freezer paper, iron to a piece of felt, and cut out the circle. I discarded the freezer paper before whip stitching the circle to the ring, forming the bottom.
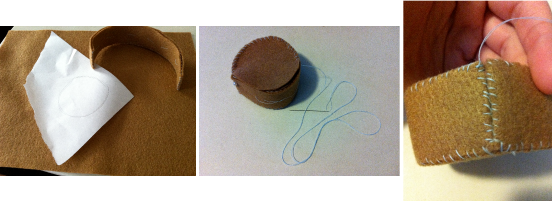
To create your basket’s handle, fold your last piece of rectangular felt as shown. Sew in place, again as shown. I found that using a basting stitch, rather than straight pins, worked well during this step. Sew the handle to the basket.

Applique your bunnies to each side of your basket, centered on the ends of the handle. Voila!
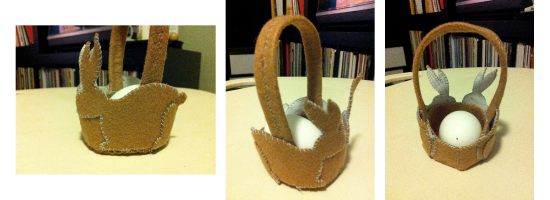
Again, I’m sorry I tired-blogged. But I think you guys can pick up what I’m putting down.


 & shop new patterns


Leave a Reply