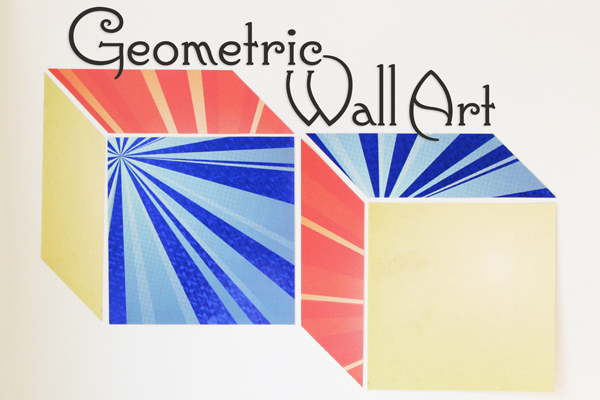
Geometry is all over the place this year, so why not incorporate it into your home (or dorm) decor? The hard part with DIYing geometric/3D decor, especially if you’re not using a template, is getting the proportions perfectly right. Lucky for you, I’ve got some simple tips for drawing out a precisely perfect cube today.
Supplies
12×12″ scrapbook paper
ruler
pencil
scissors
Glue Dots or poster adhesive
Directions
Pick three sheets of scrapbooking paper, with one color or design a shade darker and/or bolder than the other two. I chose a blue, shiny design for my bolder piece, and two warm colors for the other two. Obviously, I went with primary colors too.
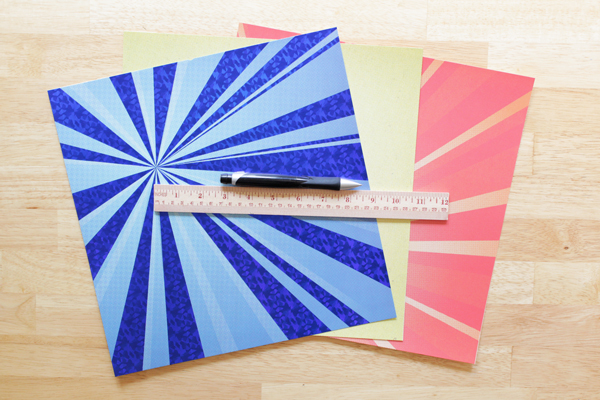
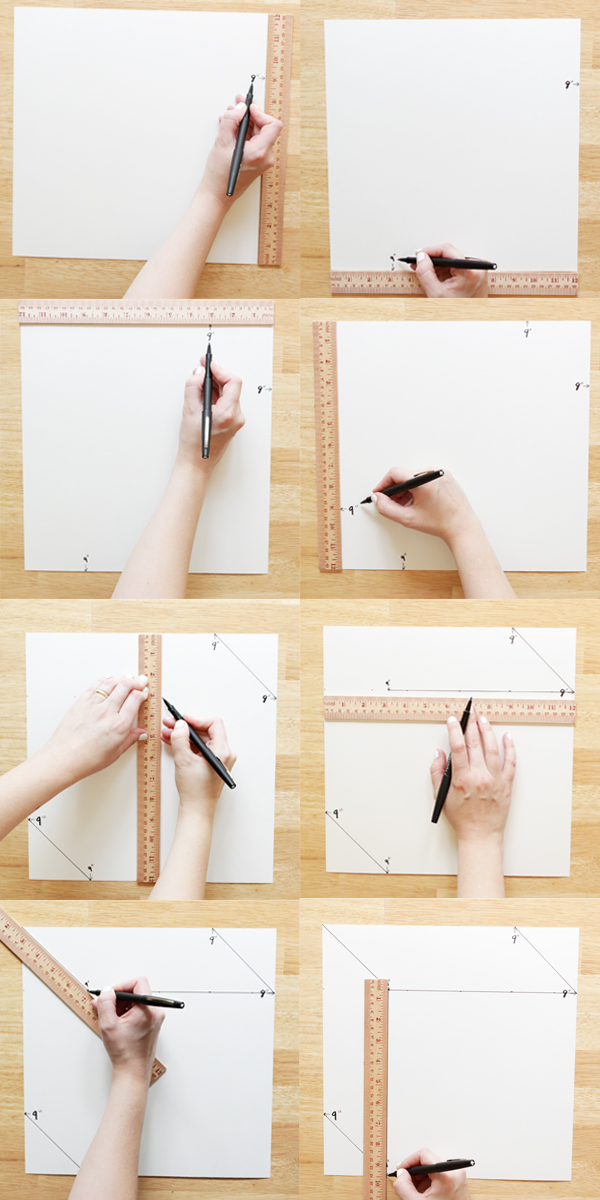
Follow the next 8 steps to draw out a cube design on the back of each piece of your scrapbooking paper. I made my cubes 9 inches with 3 inch bevels (edge pieces). You can also do this with 6×6, 8×4, etc. Really any 2 numbers that add up to 12 will do.
- Mark four points on your paper as shown at the 9 inch mark.
- Draw a diagonal line connecting them (the lines shown in photo 5).
- Draw a horizontal line across your paper that’s 9 inches from one of the straight sides by drawing a dotted line and connecting the dots (5th and 6th photos below). Stop drawing the line 3 inches from the perpendicular straight edge of the paper.
- Draw a diagonal line connecting the remaining corner of your paper to the horizontal line at 9 inches (photo 7).
- Draw a vertical line from the diagonal you just drew to the 9 inch mark at the bottom of your sheet (photo 8, the last photo).
Your finished drawing will look like this:
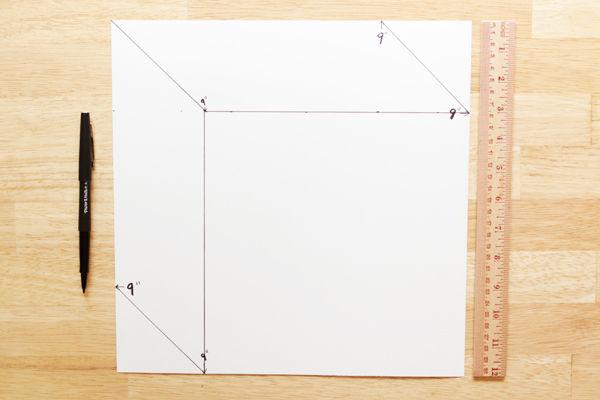
Cut off the two triangle corners, and then cut along the straight lines.
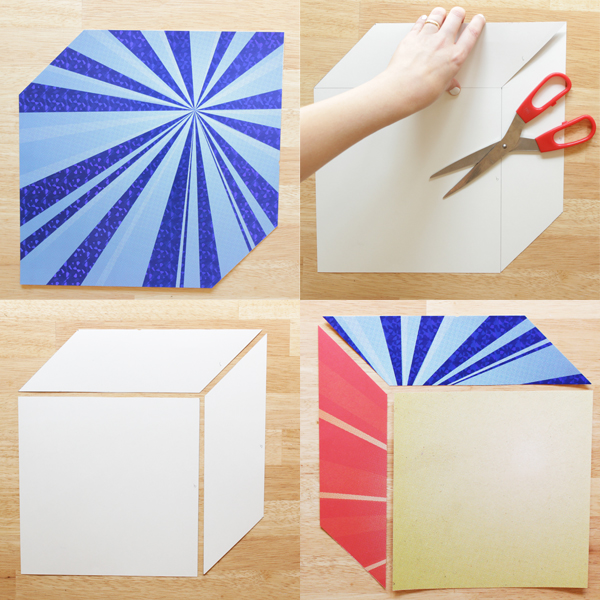
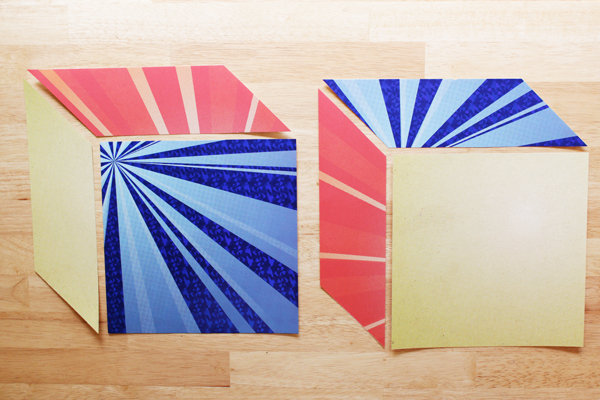
I thought it was fun to combine the three different cut-out pieces of paper into different arrangements, but the 3D effect is best accomplished by having the square shape be the boldest. The combo on the right works too, though, because the square paper is a different pattern than the top and side pieces.
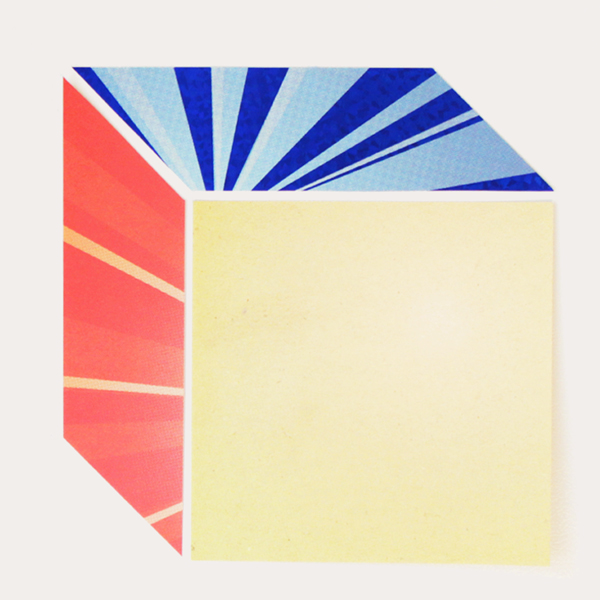
Then, just like in Monday’s project, all you’ve got to do is clean your wall where you want to hang it, add some Glue Dots or poster tack to the corners, and arrange your pieces to form cubes. Crazy simple and crazy cute, right?





 & shop new patterns


Heidi! Love your blog. Sad that we missed each other at Blogher but I’m glad Kate included your blog on her Best Of list so I could find ya. Excited about following along with all your fun projects. <3 Heidi
Likewise! (From one Heidi to another ;) )