
Supplies
bleached coffee filters
string (doesn’t really matter what kind – I used plastic twine)
food coloring
a large bowl
needle and thread
Here’s how to make an adorable pom-pom garland out of coffee filters. This project was inspired by this wedding featured at MarthaStewartWeddings.com, and I followed these instructions for constructing the pom-poms themselves.
When I find inspiring crafts online, there aren’t always instructions to go along with them. This was the case with the Martha Stewart garland. They had the glorious (seriously – click the link above) pictures from a featured DIY wedding on their site , and absolutely no instructions. It turns out that coffee filter garlands of many shapes and forms aren’t all that uncommon. A couple years ago, Anthropologie used a garland made of unbleached (brown) coffee filters in a winter catalog, and the crafty blogosphere exploded. This woman was one such reactionary crafter.
I digress. Back to the how to! See right column for photos showing you what the heck I’m trying to describe in my instructions. I’m dead serious when I say that there’s nothing more frustrating than bad crafting instructions.
- Lay out some garbage bags on a flat surface. These will be used for laying out the filters to dry.
-
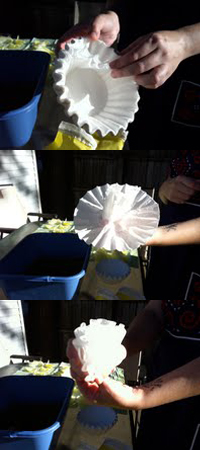 Grab two coffee filters. Fold them in half together, grab the center, and fold them up around that center point as shown.
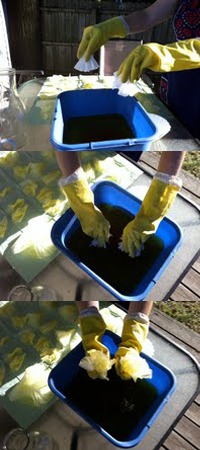
 - Mix a couple drops of food coloring and water. Tip: If you want a variety of colors, add just a couple drops of color at first. Then add a couple more drops of color for every subsequent dyeing. That way you’ll get darker and darker results as you go.
- Dip and flip:
- Wear gloves to avoid dying your hands
- Grab two bundles of filters
- Dip only the top half of them in your dye water
- Flip them to allow the dye to filter (pun not intended) the dye through the entire filter
- Squeeze out excess dye, though there shouldn’t be too much to get rid of – the dip & flip technique avoids having much excess dye all over the place. This will also help speed up drying time.
-
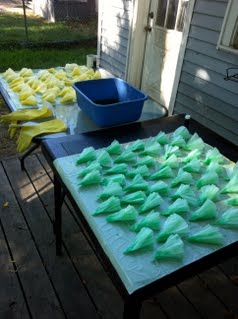 Lay dyed, wet filters on your garbage bags to dry. This blogger was totally upfront about her impatience with drying dyed coffee filters and suggests drying the filters in the oven. Personally, that made me nervous, and I knew I needed to make these en masse. I just set up card tables in my basement and turned up the dehumidifier.
 - Remember to turn your dyed filters every couple of hours to make sure they dry completely. I found that the garbage bags I used as a drying surface worked great for storage, but make sure your filters are 100% dry before putting them in there. Garbage bags don’t exactly breathe. I had visions of a giant bag of mold when I realized I’d stored some of my filters before they were completely dry.
I’ll have instructions for assembling the pom-poms and garland ready in the next couple days. For now, happy dyeing.



 & shop new patterns


Leave a Reply