Every time I visit a clothing store that carries scarves, I end up going on and on about how ridiculously priced they are. Really? $70 for a rectangle of fabric? Let me do you a favor and introduce you to a little something called a rolled hem. You don’t even need a sewing machine.
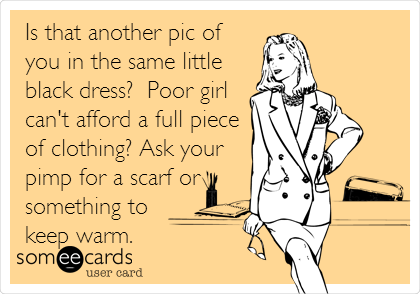
Sometimes I love someecards…
But really, take 45 minutes and learn to sew a rolled hem so you don’t have to resort to desperate measures for a scarf to style that outfit with. ;)
Supplies
fabric scissors
needle
thread
1/4 yard of fabric
Directions
The fabric I used for this is great to learn hand sewing on because it’s a gingham print. Any plaid or striped fabric works well for making your first scarf because you will always know you’re sewing straight due to the lines of the print. The whole point of this tutorial, however, is that you can use any fabric you want to make a stylish scarf for, uh, 50 cents instead of $70.
The fabric remnant I used for this project was just 1/4 of a yard, but the edges weren’t cut straight. Using the print as my guide, I straightened out the two raw edges, which became the long sides of the scarf.

The short ends of the scarf are called selvage, for those of you new to sewing. Basically, these are the machine-finished edges of the fabric that can’t ravel or fray. Since the selvage of this gingham isn’t ugly and goes with the fabric’s overall pattern well enough for my taste, I decided to leave the ends of this scarf totally untouched.
Begin sewing a rolled hem on one of the long sides of the scarf. They don’t called rolled hems “rolled” for nothing. They’re literally made by rolling the edge inward (toward the center of the wrong side of the fabric) and sewing it into place. Rolling the hem isn’t like rolling a sleeping bag or cigarette or whatever you commonly roll – it’s much more subtle. When I sew rolled hems, I lick my finger and carefully roll the fabric into place with my thumb and forefinger, but you can use a damp sponge if you’re more sanitary than I.
To begin, thread your needle and knot the end of your thread. Insert the needle into the end of the roll and come out the top of the roll, like this:
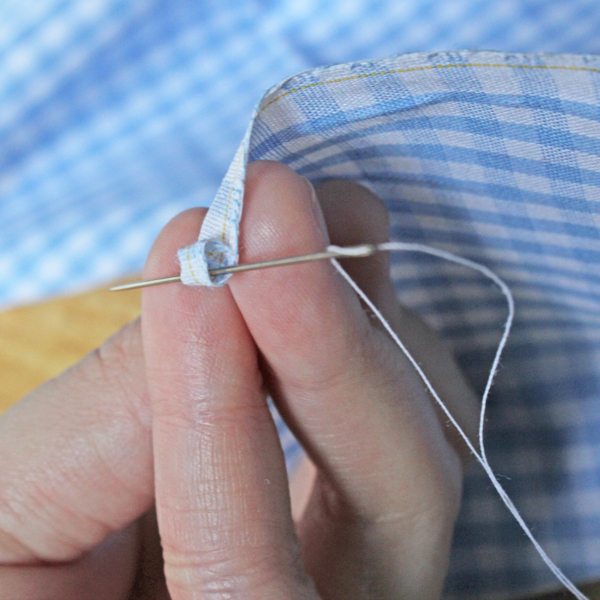
Next, bring down your needle just below where you pulled your thread through to catch a few threads of the fabric and pull your thread through.
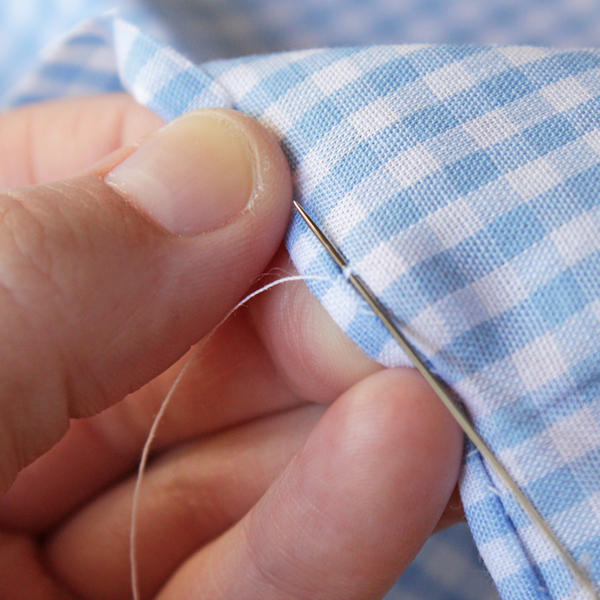
Then, pierce the top of the roll with your needle directly above where you sewed a moment ago. Draw your thread through a centimeter or two of the top of the roll, like this:
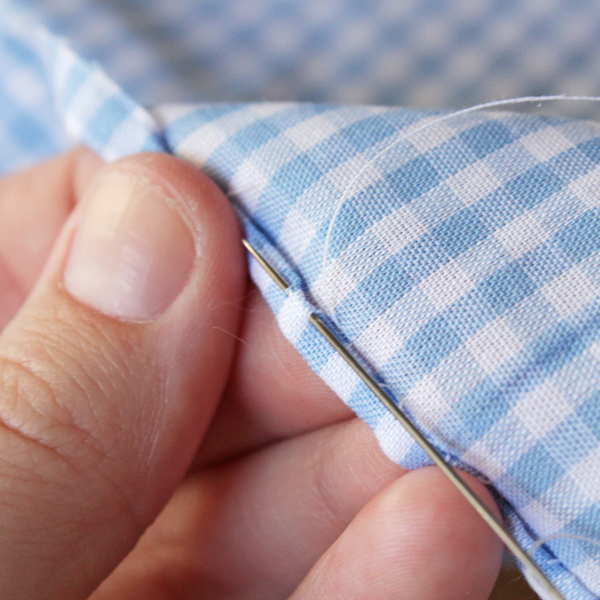
On the right side of the scarf, you don’t want tons of sewing to show through, which is why you only catch a few threads at a time when sewing the main body of the scarf. See how my stitching looks here:
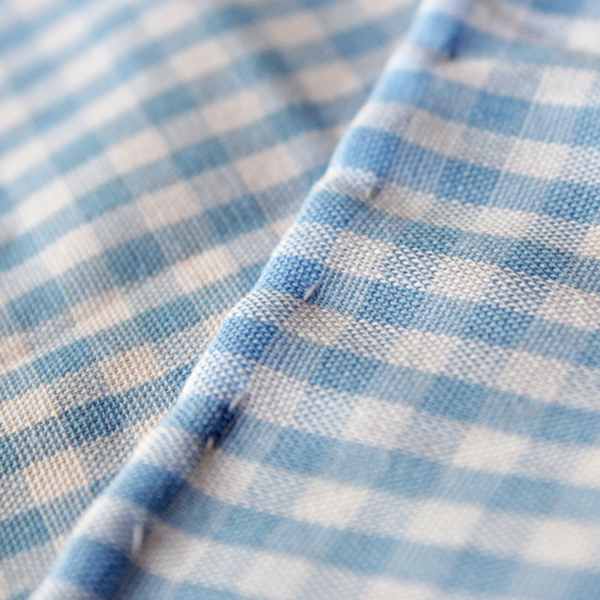
Just keep repeating this process over and over again until you reach the end of your scarf. Tie off your thread and repeat the process on the other raw edge of the scarf.
Rolled hems are also used for making men’s pocket squares, which is how I first was introduced to them, before I decided to try one out on a scarf. With the holidays coming up, you can use a rolled hem to sew the men in your life pocket squares. Just cut a 12×12 inch square of fabric and sew a rolled hem all the way around. The dude will think you’re really crafty and fancy, and you’ll have only spent a few bucks.
Want to see this explained another way? Check out this tutorial from The Purl Bee or this tutorial from The Zen of Making. They’re both great, and focus on creating pocket squares rather than scarves.



 & shop new patterns


This is so simple and great! Thank you for the confidence to do this. I have so much fabric and not enough scarves! Ha, I don’t think there’s such a thing as too many scarves these days…
Thanks! now I can make as many pocket squares as i want. Yay!!!
Thank you! Got some reason I ended up with yards of silk, and was afraid to do scarves because I didn’t want to have to buy yet another foot for the sewing machine.
Thank you! I searched for this how to and yours the first I chose. You’re instructions are perfect and in my minds eye, I could see my mom sewing that hem. I picked up a gorgeous piece of material with a nice weight and I wondered how I was going to hem it. Thanks!
You’re welcome, April! <3
Thanks Heidi! Very helpful–just what I needed to know.