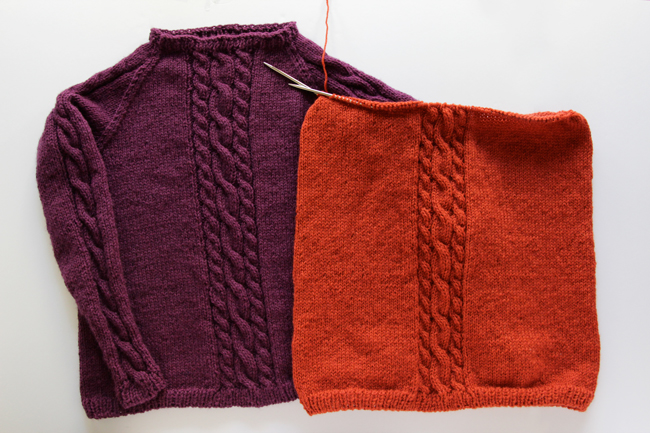
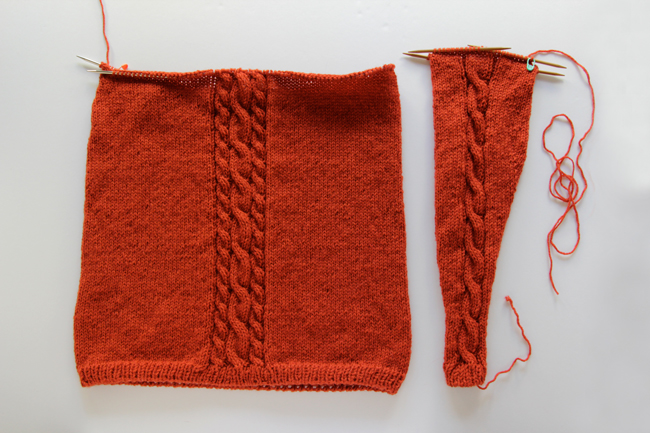
 Great news! If you’ve finished knitting the body of your sweater, you’ve done the biggest chunk of knitting required for the whole Remy Pullover knit along! That’s one of the reasons I love bottom up sweaters – you get the biggest part of it out of the way first. :) Today is officially day 2, which makes it sleeve knitting time. The sleeves in the Remy Pullover are pretty straightforward. Knit from the wrist up, they increase in size gradually from mid forearm through mid upper arm, and will later be attached to the sweater body with a raglan style sleeve.
On knitting increases with the Remy
I think a lot of knitters learned basic increases when they knitted their first hat. At least I don’t think that was just me. There are a lot of easy and common increases, like YO, KFB, KRL, KLL, and M1 (if any of these abbreviations are new to you, I looove this knitting increases infographic from Knitting Help.) For this sweater, I’m just using M1, or make 1 (tutorial here).
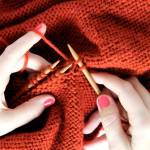
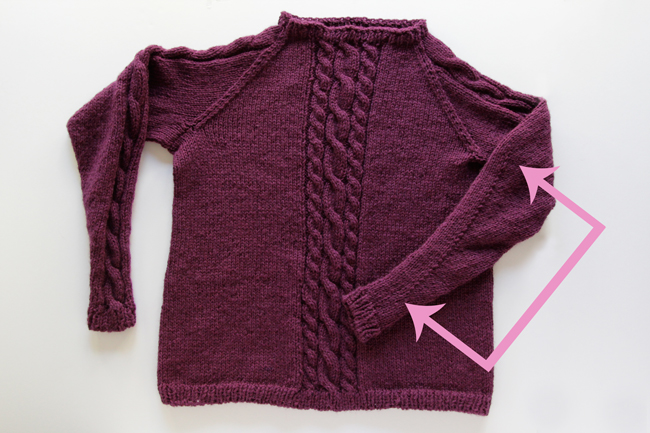 Marked in pink above, the sleeve increase is knit over several rows, alternating the row in which a stitch is added (a.k.a. an M1 happens), and working one row without any increase. This is a pretty standard way to increase over the course of several rows, and it results in a subtle ridge on the backside of the sleeve where the M1s occurred.
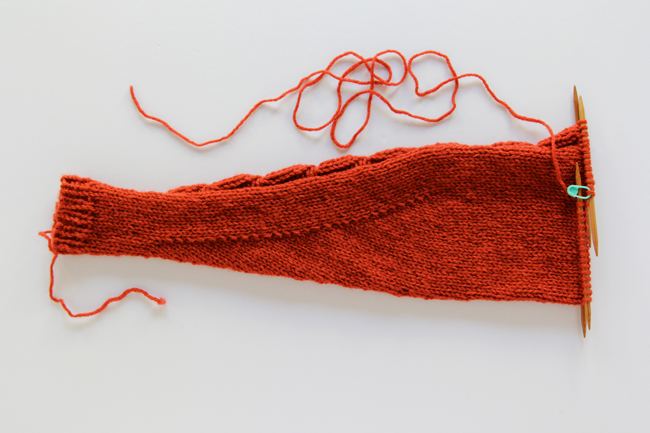 The back of a finished Remy Pullover sleeve, increase shown.
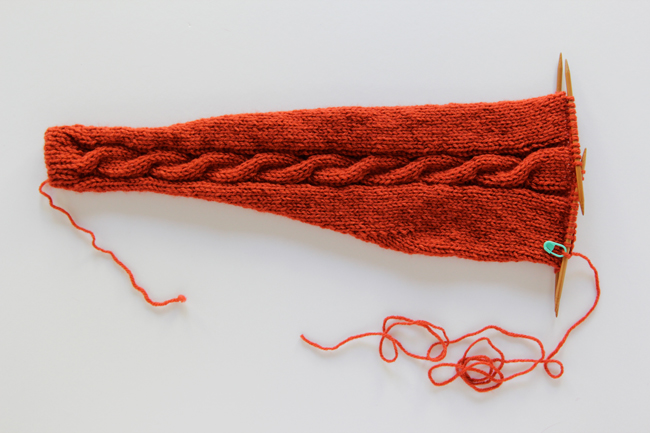
Outside of a finished Remy Pullover sleve, featuring the left-leaning 3 over 3 cable motif from the center front of the sweater body.
The Remy Pullover: Knit Along Day 2 Pattern (sleeve 1)
Sizing: Please refer to the day 1 post & pattern for more sizing info. Since this is a sleeve pattern, the measurements we need are the wrist, elbow and upper arm measurements.
XS – 7 inch wrist / 9.5 inch elbow / 11 inch upper arm diameter
S – 7.5 / 10 / 11.5
M – 8 / 10.5 / 12
L – 8.5 / 11 / 12.5
XL – 9 / 11.5 / 13
XXL – 9.5 / 12 / 13.5
Abbreviations:
CO – cast on
k – knit
p – purl
sts – stitches
LCx3 – work 6 stitches in a left leaning cable (3 stitches over 3 stitches)
M1 – make 1 (never done an M1 before? here’s an easy tutorial)
Note: Just like with the sweater body, I cast on with a long tail tubular cast on, which includes 2 setup rows. If you use a cast on other than that, you can either knit 7 rows of k1, p1, or just subtract 2 rows from the 7 and knit 5 rows of k1, p1. If you do the second option, just remember to make a note of what row you’re on as you work.
Heidi’s Size L Sleeve (a.k.a. a size L with spindly wrists)
In writing the sleeve pattern for this post, I had long conversations with my husband, who has advanced degrees in math, about sizing. As I mentioned in the day 1 post, I am a 40/30/40 relatively standard size L lady. Now that we’re making sleeves, things get more complicated. My wrists are only 6 inches around, but my elbows are a pretty standard 11 inches and my upper arms are 12.5 inches. Many patterns’ size XS wrist circumferences are 7ish inches. What’s a size L woman with spindly wrists to do? Math. Math is what she is to do. In an effort to keep this post from being a million miles long, I made you a PDF with the pattern for standard sizes XS through XXL like before, which you can download here. And if you’ve got the same spindly-wristed measurements as me, which are 6″ wrists / 11″ elbows / 12.5″ upper arms, you can use the pattern I’m using for the Remy Pullover’s sleeves, which looks like this:
CO 28 sts
row 1-2. k1, sl 1
row 3-7. k1, p1
row 8-9. k9, p2, k6, p2, k9
row 10. k9, p2, LCx3, p2, k9
row 11-20. repeat row 8 (10 rows)
row 21. repeat row 10
row 22. M1, k9, p2, k6, p2, k9 (29 sts)
row 23. k10, p2, k6, p2, k9
row 24. M1, k10, p2, k6, p2, k9 (30 sts)
row 25. k11, p2, k6, p2, k9
row 26. M1, k11, p2, k6, p2, k9 (31 sts)
row 27. k12, p2, k6, p2, k9
row 28. M1, k12, p2, k6, p2, k9 (32 sts)
row 29. k13, p2, k6, p2, k9
row 30. M1, k13, p2, k6, p2, k9 (33 sts)
row 31. k14, p2, k6, p2, k9
row 32. M1, k14, p2, LCx3, p2, k9 (34 sts)
row 33. k15, p2, k6, p2, k9
row 34. M1, k15, p2, k6, p2, k9 (35 sts)
row 35. k16, p2, k6, p2, k9
row 36. M1, k16, p2, k6, p2, k9 (36 sts)
row 37. k17, p2, k6, p2, k9
row 38. M1, k17, p2, k6, p2, k9 (37 sts)
row 39. k18, p2, k6, p2, k9
row 40. M1, k18, p2, k6, p2, k9 (38 sts)
row 41. k19, p2, k6, p2, k9
row 42. M1, k19, p2, k6, p2, k9 (39 sts)
row 43. k20, p2, LCx3, p2, k9
row 44. M1, k20, p2, k6, p2, k9 (40 sts)
row 45. k21, p2, k6, p2, k9
row 46. M1, k21, p2, k6, p2, k9 (41 sts)
row 47. k22, p2, k6, p2, k9
row 48. M1, k22, p2, k6, p2, k9 (42 sts)
row 49. k23, p2, k6, p2, k9
row 50. M1, k23, p2, k6, p2, k9 (43 sts)
row 51. k24, p2, k6, p2, k9
row 52. M1, k24, p2, k6, p2, k9 (44 sts)
row 53. k25, p2, k6, p2, k9
row 54. M1, k25, p2, LCx3, p2, k9 (45 sts)
row 55. k26, p2, k6, p2, k9
row 56. M1, k26, p2, k6, p2, k9 (46 sts)
row 57. k27, p2, k6, p2, k9
row 58. M1, k27, p2, k6, p2, k9 (47 sts)
row 59. k28, p2, k6, p2, k9
row 60. M1, k28, p2, k6, p2, k9 (48 sts)
row 61. k29, p2, k6, p2, k9
row 62. M1, k29, p2, k6, p2, k9 (49 sts)
row 63. k30, p2, k6, p2, k9
row 64. M1, k30, p2, k6, p2, k9 (50 sts)
row 65. k31, p2, LCx3, p2, k9
row 66. M1, k31, p2, k6, p2, k9 (51 sts)
row 67. k32, p2, k6, p2, k9
row 68. M1, k32, p2, k6, p2, k9 (52 sts)
row 69. k33, p2, k6, p2, k9
row 70. M1, k33, p2, k6, p2, k9 (53 sts)
row 71. k34, p2, k6, p2, k9
row 72. M1, k34, p2, k6, p2, k9 (54 sts)
row 73-75. k35, p2, k6, p2, k9 (3 rows)
row 76. k35, p2, LCx3, p2, k9
row 77-86. repeat row 72 (10 rows)
row 87. repeat row 75
row 88-97. repeat row 72 (10 rows)
row 98. repeat row 75
row 99-108. repeat row 72 (10 rows) Break your yarn, leaving a 12-16 inch long tail.
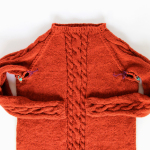
If you’re looking for a custom and/or unusual fit, you’ll have to do some sweater math like I did to get the perfect fit. If you’d like help with that, let me know. Leave a comment here or in the Ravelry group. I’m happy to help. :) When your first sleeve is done, whether or not it involves spindly wrists and lots of math, this is how much progress you’ll have made on your sweater. Isn’t that awesome?!
Lion Brand Prize Pack Giveaway
Now that day 2 of the KAL is here, entries are now open for the prize pack giveaway, sponsored by Lion Brand! There are a few social media following/posting ways to enter, and for each day of the KAL that you complete, you can get an additional entry into the giveaway. Each day a new section of the pattern is posted, a new giveaway entry option will be added too! Remember to keep knitting and sharing your progress using #handsoccupiedkal. For now, spend the week knitting up your first sleeve, and next Monday, October 20, we’ll move on to sleeve 2. Can’t wait! a Rafflecopter giveaway
The Remy Pullover knit along is brought to you by Lion Brand Yarns. Check out Lion Brand on social media: Facebook / Twitter / Instagram / Pinterest. If you’re still needing to buy your yarn, you can get 20% off Wool Ease yarn from Lion Brand with the coupon code handsoccupied14 at lionbrand.com! The code’s good through THIS FRIDAY (!), October 17.
 —
—
Other posts in this series:
- Announcing the fall knit along! The Remy Pullover
- How to do a long tail tubular cast on (optional tutorial for the cast on I like for this pattern)
- Do the math, get the fit / Fall Knit Along Day 1
- Knit Along Tips, Tricks & An Official Schedule
- Knit Along Day 2: Sleeve time!
- Fall KAL Day 3: The Other Sleeve
- How to attach sleeves / KAL Day 4
- How to knit a raglan decrease / KAL Day 5
- How to knit the collar / KAL Day 6
- more coming soon!


 & shop new patterns


Hey, we have the same arm measurements! (That’s not a weird things to say…) Thank you for instructions on how to knit for strangely-proportioned arms!