In my last tutorial, I demonstrated the differences between continental and throwing style knitting, including how to knit with each method. Interestingly, many knitters commented that purling, specifically tensioning the working yarn at the front of the work, was challenging to master in continental style. I also ran into issues with my purl tension, as well as minor finger pain, as I developed my continental knitting style. Between these issues and those mentioned by commenters, I did some digging, and it turns out, something called Norwegian purling can help.
What is a Norwegian Purl, and why is it worth a try?
Using this approach to purling has some advantages. Many continental style knitters find that being able to work purl stitches without jump-roping your yarn from the back to the front of the work is more convenient and results in more even tension. Norwegian purling is great for knit-and-purl stitches like ribbing, seed or moss stitch.
Is it just a Norwegian technique? Based on cursory internet research, it appears this purling method is popular in Norway, Denmark and Switzerland (but not Sweden for some reason?). If anyone who’s reading this can confirm or deny this, please let me know. I have great-great-grandmothers from all of those countries, but didn’t grow up seeing this purling method at all.
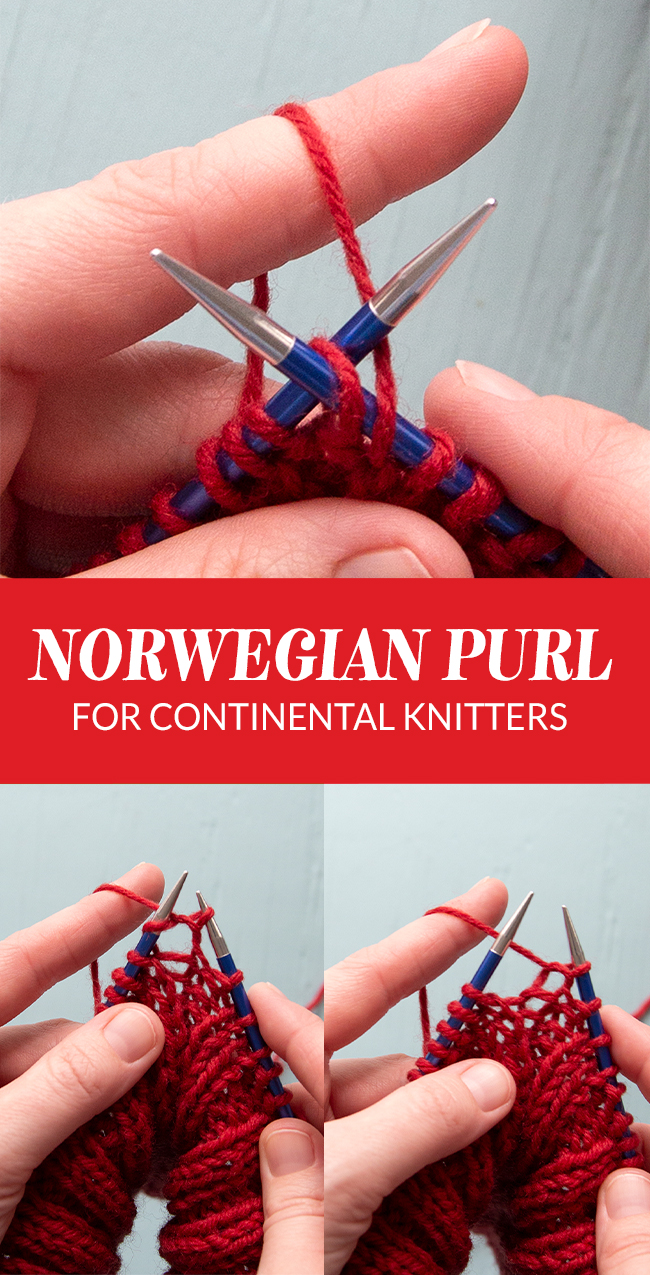
How to do a Norwegian style purl for continental knitting
Photo Tutorial
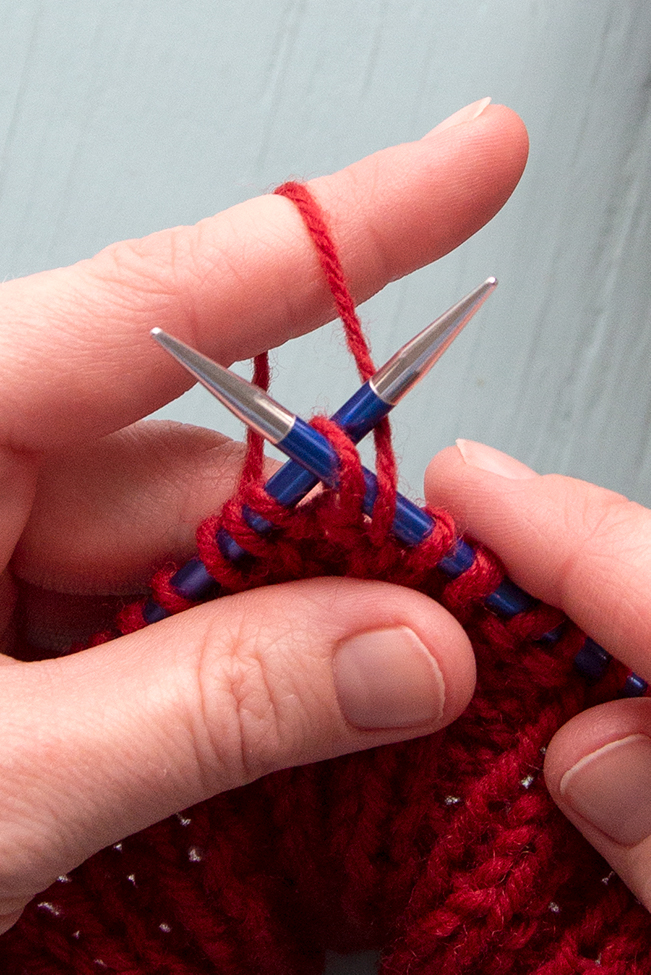
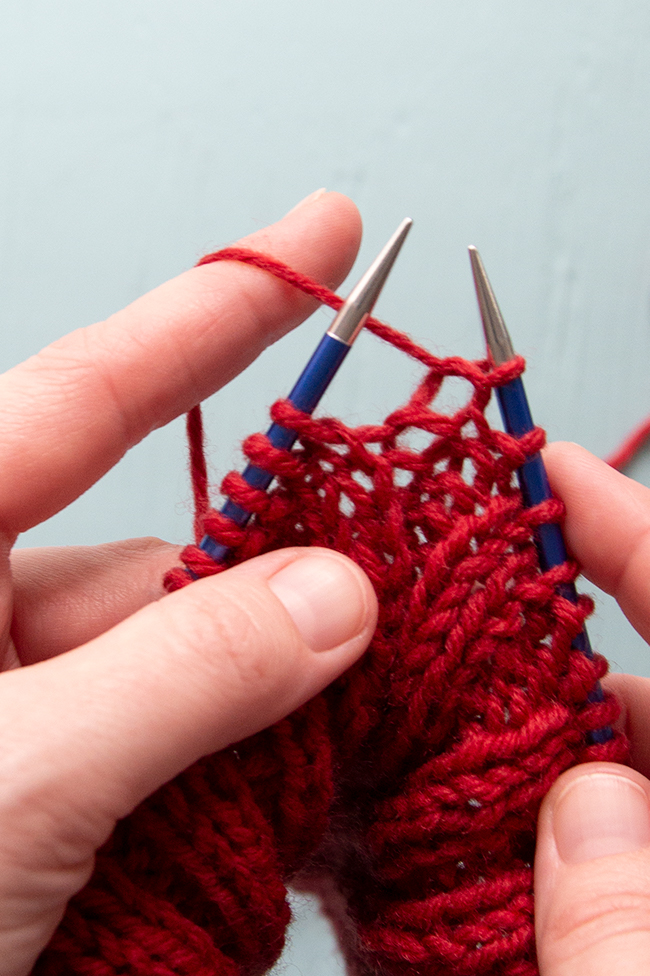
1. Going behind your working yarn, insert your right hand needle into the next available loop on your left hand needle. If you don’t begin by going BEHIND your working yarn, you’ll end up with an extra yarn over between stitches.
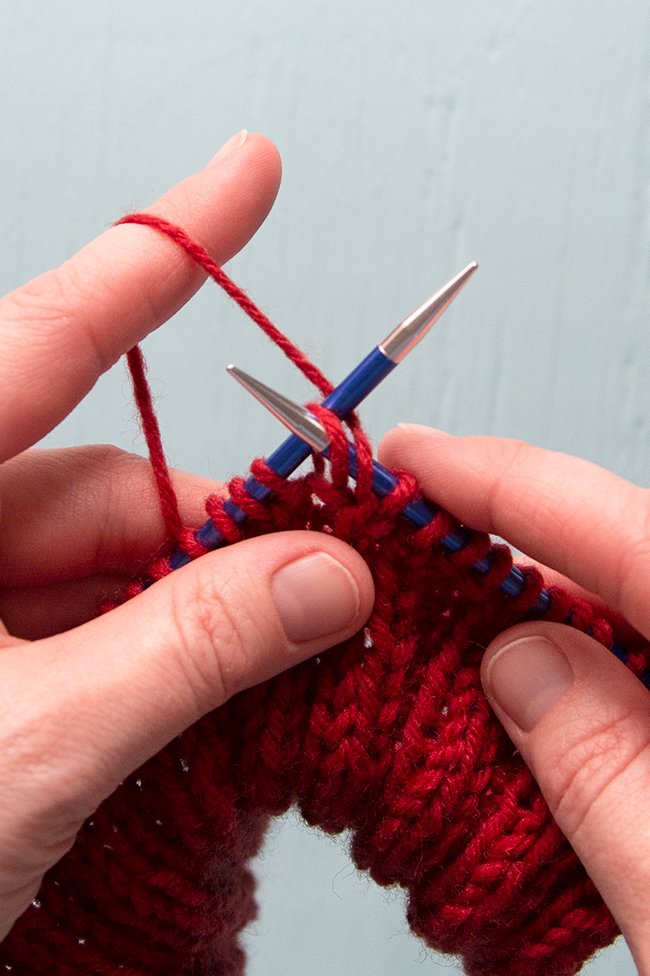
2. Bring the tip of your right needle around to the back of your work, still inserted into that first loop on the left needle. (Tip: Look closely at the reference image or check out the video if you’re struggling with this step.) Then, you’ll wrap the working yarn around the right needle.
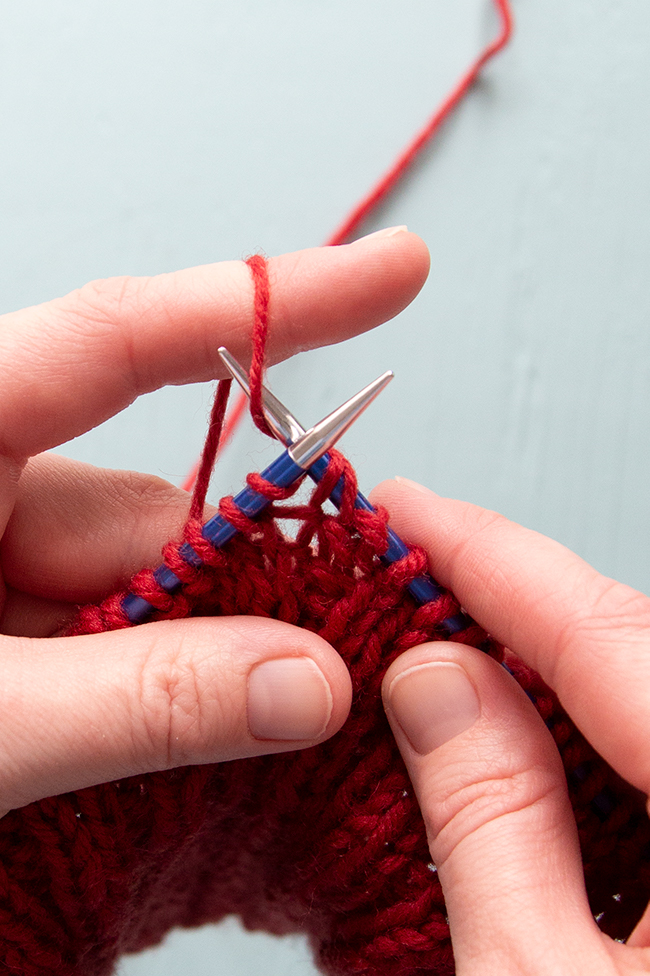
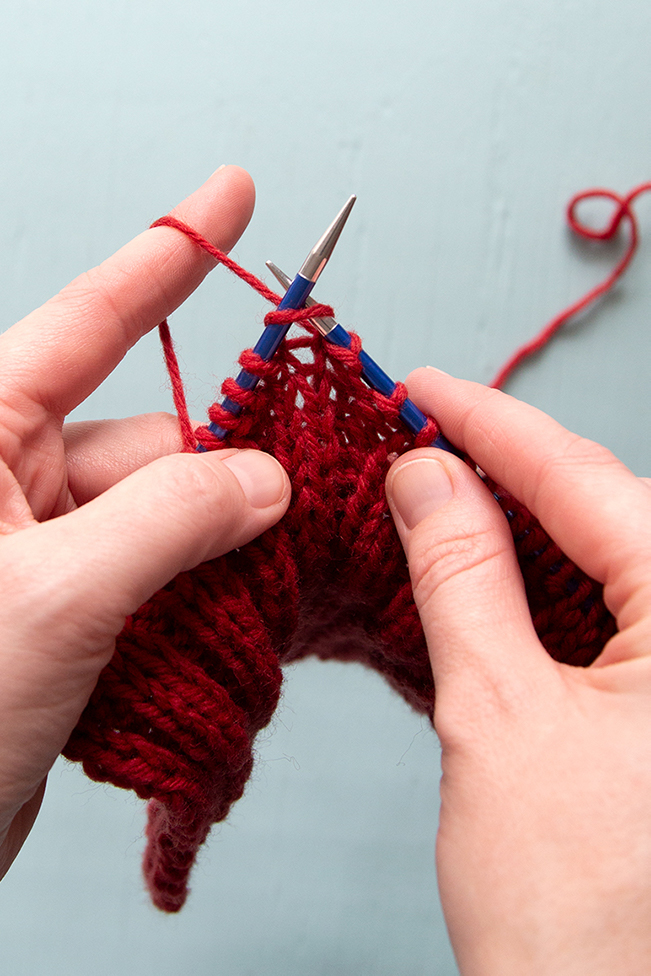
3. Bring the right needle back around to the front, and draw the wrapped working yarn up through the first loop on your left needle.
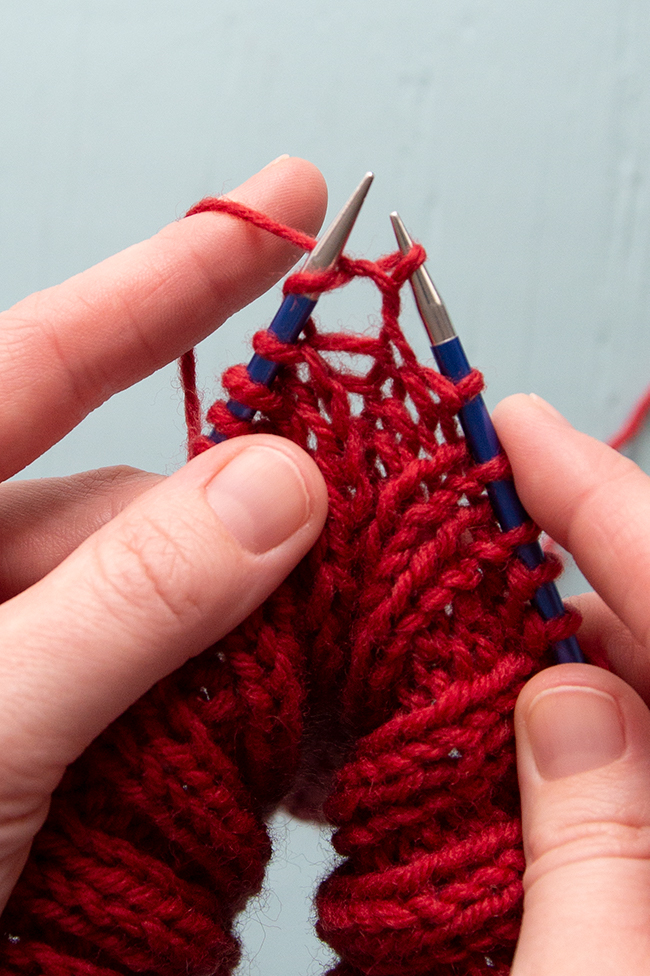
4. Sweep it off the needle.
P.S. Here’s what getting ready to work a continental style knit stitch after finishing a Norwegian purl looks like – yarn remains at the back.
Video tutorial
And here’s how to do this in video form, starting with a brief overview of the technique and including a slow motion section with repeats to help demonstrate the technique. If you’re finding you want the video even slower, you can click the sprocket icon at the bottom of the video (it looks like this: 
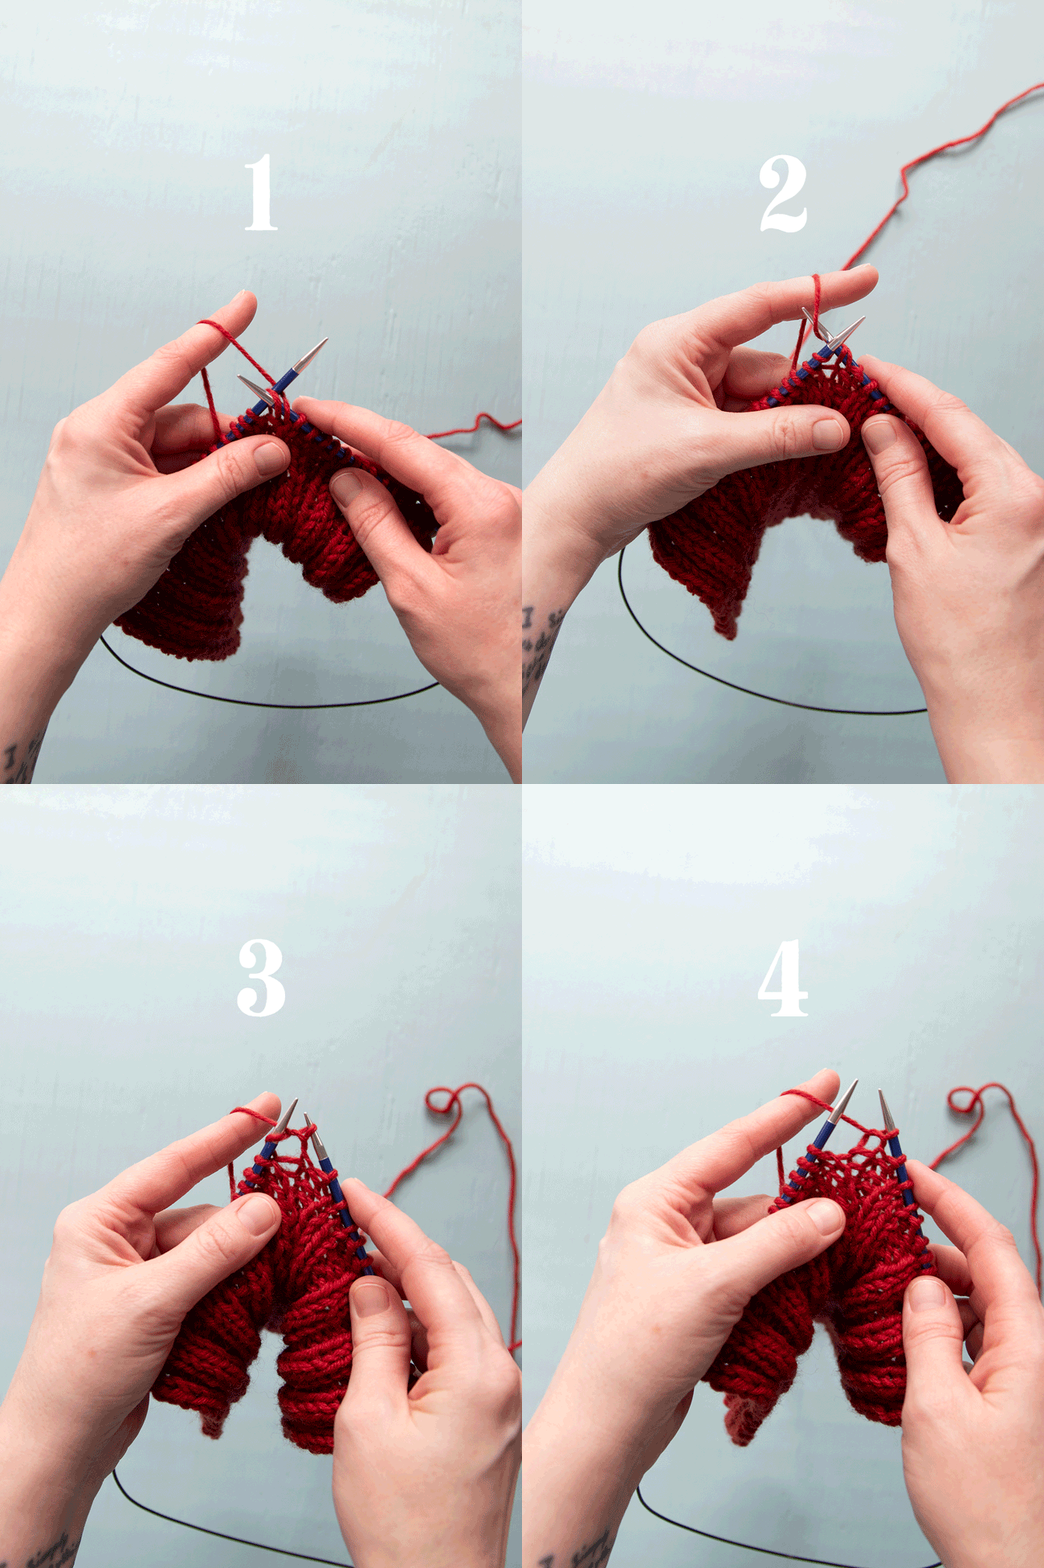
Animated GIF tutorial
This particular technique was well-suited to animation, so I thought I’d give it a go. If you’re like me, you might not be the most patient when you’re just looking for a refresher tutorial on something you’ve learned in the past. Hopefully this will be useful!
(We knitters would never be impatient… 
Useful resources:
- Knit Stars: How to Norwegian Purl with Arne & Carlos – This was my first introduction to this type of purling, thank you for this!
- The Norwegian Knit and Purl Revisited – A couple in-depth looks at the technique using video for those who want to learn more tips & tricks.
- Norwegian Purl Photo Tutorial – Using 2 colors of yarn for clarity.



 & shop new patterns


Thank you! My current situation preclude me from watching a video tutorial, so your written instructions were exactly what I was looking for and struggling to find.
Glad it was helpful! :)