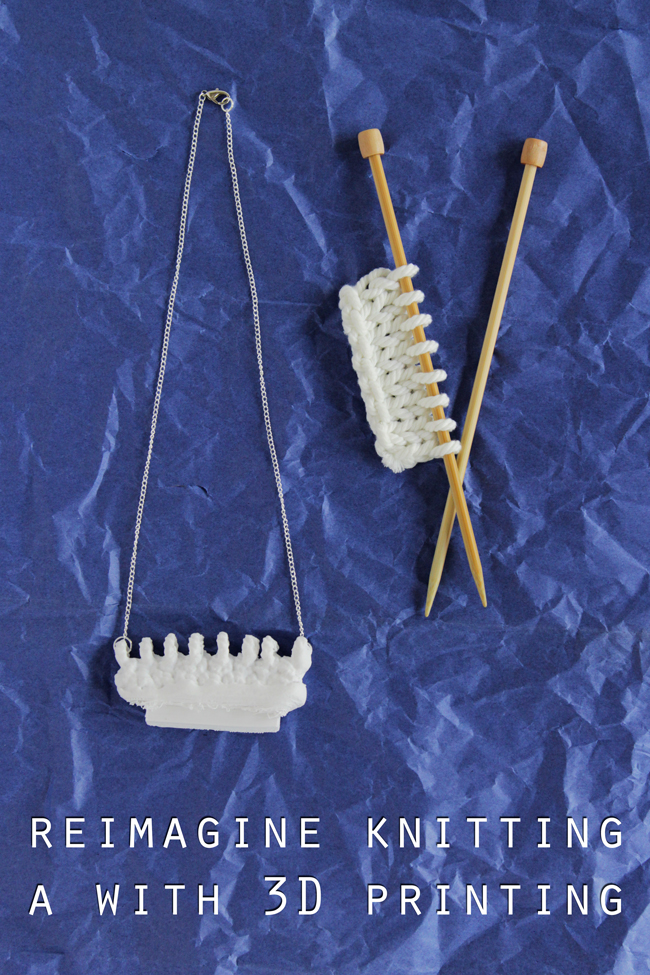
As a public librarian, I have been able to experiment with 3D printing as part of my job working with teens. I’m lucky because my library has a maker lab outfitted with all kinds of equipment designed to enable people to develop their own designs, ranging from avant garde shoes to robots. 3D printing has been around for awhile, but has become more accessible recently. If you’re brand new to 3D printing, it is what it sounds like: printing in 3 dimensions as opposed to flat. The 3D printer I have uses a recyclable filament that, when heated, forms objects layer by layer. If you’re curious to see how 3D printing looks in action, check out the video in this post.
Now that we’ve gone over what 3D printing is, I should probably tell you what the heck this has to do with knitting! :) Earlier this year, I shared 2 dimensional scanning and design that can be done with the HP Sprout by letting you inside the knit design process and showing you how to digitally organize your yarn labels. More recently, HP sent me a 3D Capture Stage and the Dremel Idea Builder, a 3D printer, to use along with the Sprout so I could take this technology to the next level and reimagine knitting with 3d printing.
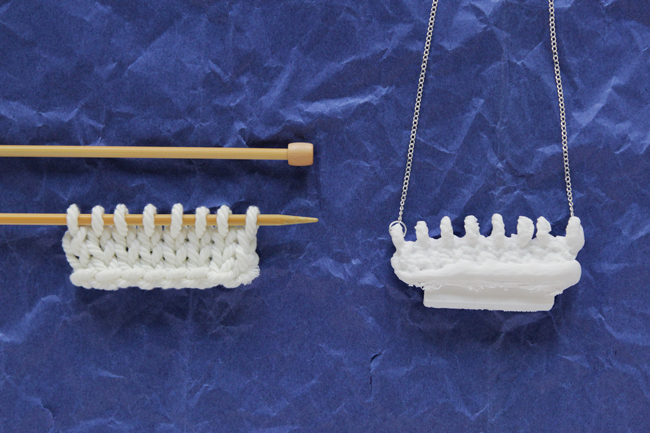
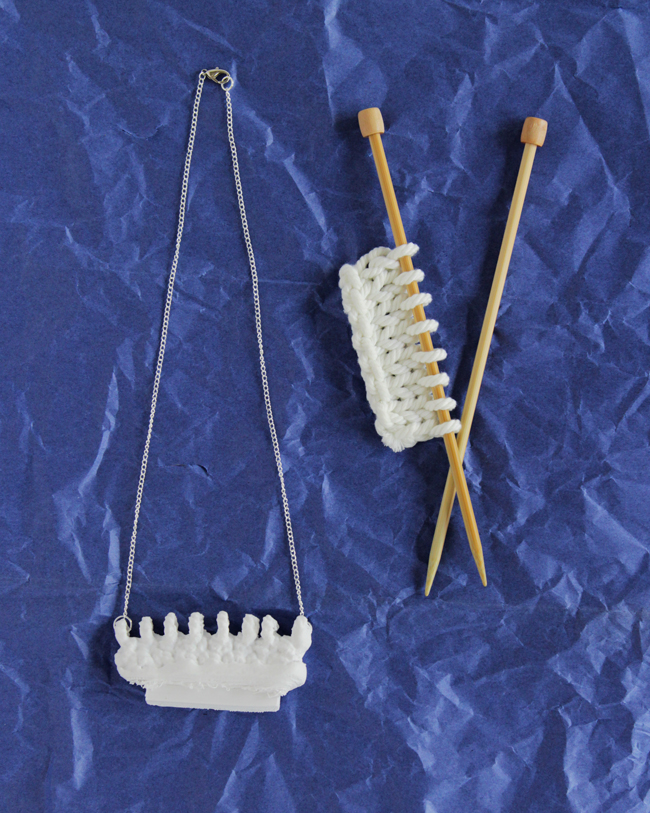
Using a swatch of knitting made with rope, I 3D scanned, modified and printed a statement necklace using HP’s technology, all in the comfort of my own home. After successfully printing my swatch, I attached the 3D printed pendant to jewelry chain and a lobster clasp with craft pliers and jump rings.
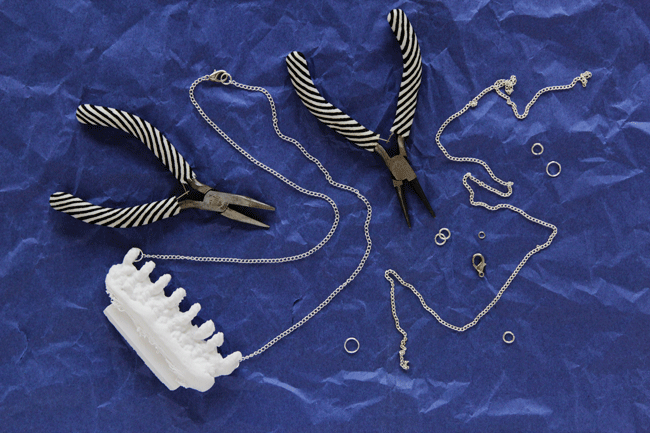
Supplies
HP Sprout
white rope
knitting needles
HP 3D Capture Stage
Dremel Idea Builder (3D Printer)
jump rings: two 7mm, one 4mm & one 6mm
lobster clasp
jewelry chain
jewelry pliers
Directions
I made a video to show you how I was able to create this project, end-to-end, using the Sprout’s all in one desktop technology:
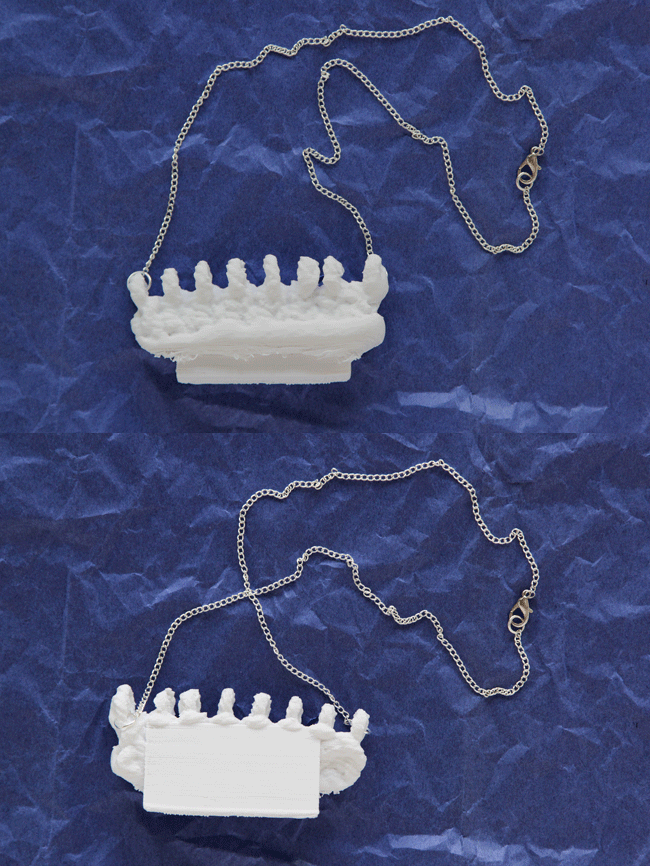
As I mention in the video, I added a backing piece to my 3D scan to give it some added structure. The natural shape of the knitting was too delicate to print on its own, so incorporating a thin wedge on the back made 3D printing it possible. Check out the front and back of the pendant in this GIF to see how I made this scan and print work.
The final step of attaching the jewelry chain to the 3d printed pendant was easy! Since the 3D scan detected the open loops at the top of the swatch, all I need to do was attach jump rings to the loops on each side of the pendant. I used two 7mm jump rings to attach the chain to the pendant, and I used a 4mm ring to attach the clasp to the chain and an additional 6mm jump ring to the raw end of the chain.
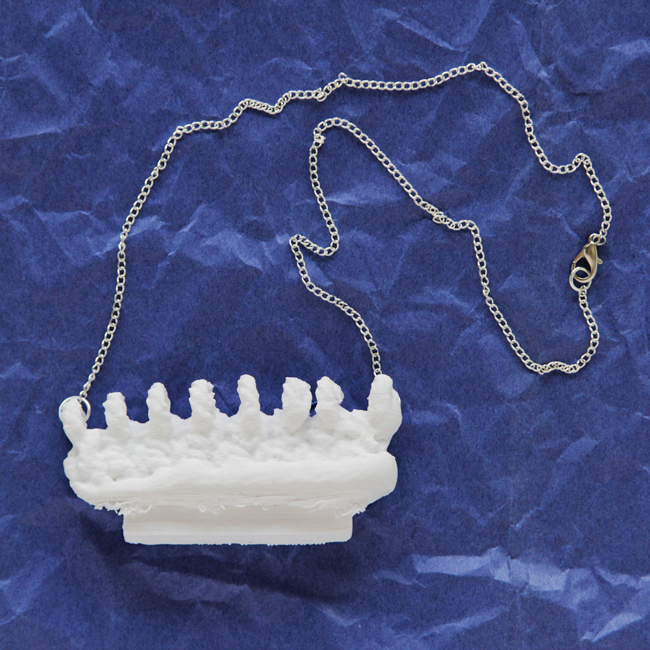
Like I say in the video, I really am loving wearing this lightweight statement necklace. As knitters, we’re used to the great feeling of getting to wear something we’ve made by hand. What’s extra special for me about this piece is knowing that every bit of it, from beginning to end, was designed and made by me. Even though this project has an industrial feel, there’s some soul in it too, having come from my own hands.
This is a sponsored post. HP provided compensation and the equipment used to create this project.



 & shop new patterns


3D Printing is an awesome thing – for PAXPrime, a YouTube me and my Mister follow 3D printed a Stormtrooper suit to wear, and it turned out rather fantastic! I haven’t yet heard of scanning something in to print it up, though – that would be fun to explore! :D
wow, what a cool idea, and how fun that you get to experiment with this technology! I haven’t tried 3d printing yet, but I’d love to give it a go. I’m hoping in the future we’ll have other materials we can ‘print’ with, other than plastic. Imagine how pretty it would be to do the same design in metal!
Thanks, Julie! It was fascinating! :)